Settings — Receipt printer
import { Aside } from ‘@astrojs/starlight/components’;
When to use this page
Section titled “When to use this page”After a successful tender, the system prints a paper receipt for the customer. This guide is for the store owner configuring the printer (not for the cashier ringing sales).
Source: apps/vendor-web/src/app/point-of-sale/pages/settings/settings-hardware-printer-page.tsx + <DeviceSettings hardwareFocus="printers" />.
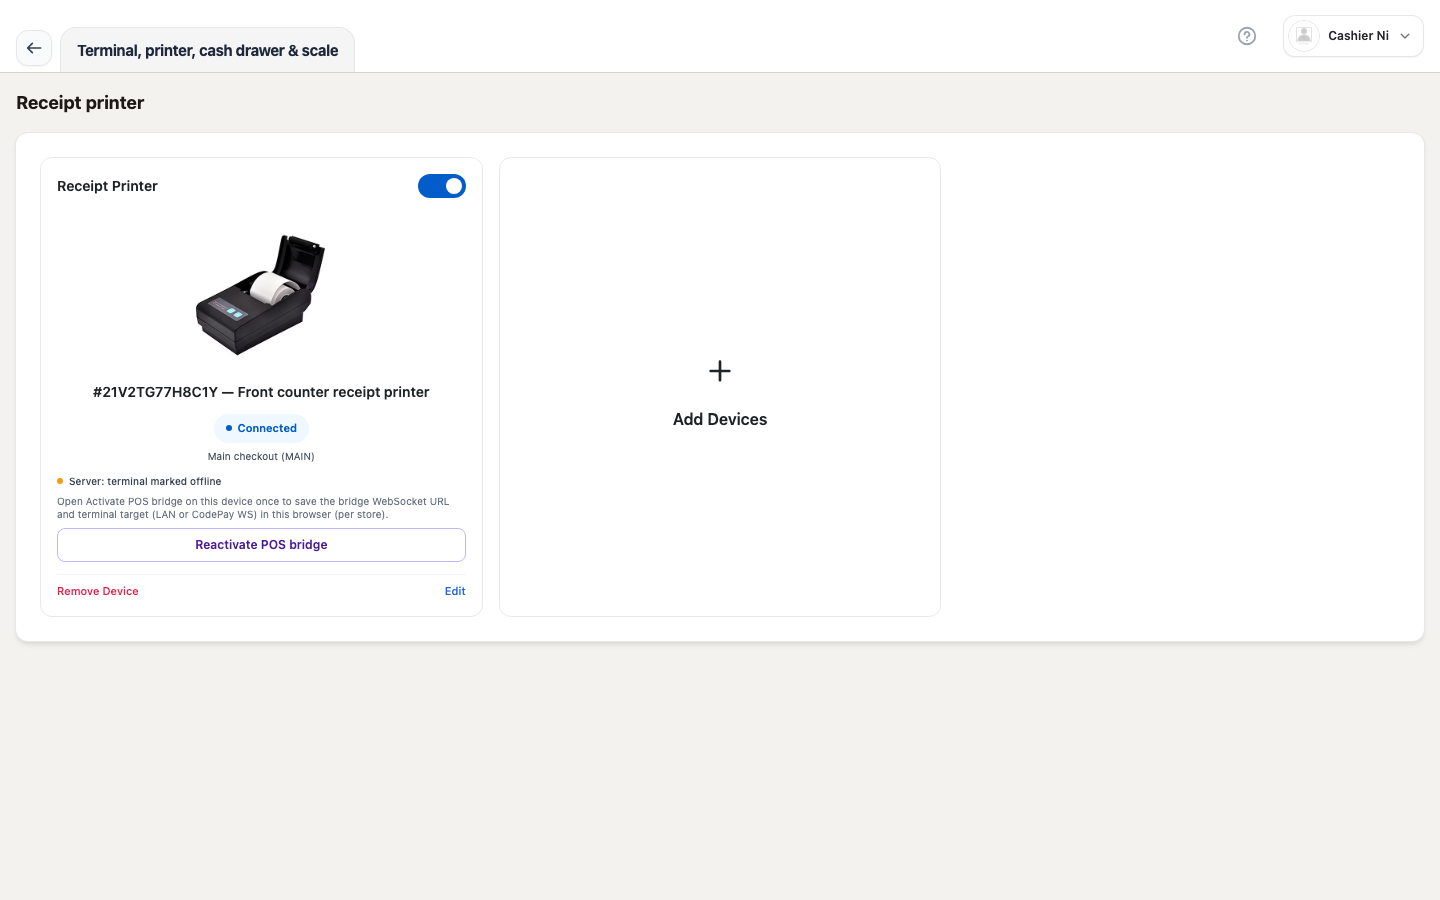 Image: receipt printer config — device list (TCP / USB / SYSTEM), enable/disable toggle, bridge activate button. Spec owner:
 cashier-screenshots.spec.ts → "settings — receipt printer".
Before you start
Section titled “Before you start”- Vendor Desktop must run on the lane PC — the receipt printer connects through this app; a pure browser install cannot reach the printer.
- Cashiers don’t need
settingsto ring sales, but they do needsettingswrite to configure the printer (owner only). - You need the IP + port of the TCP printer, or the local printer name (Windows / macOS).
4 configuration steps
Section titled “4 configuration steps”Step 1 — Open the printer page
Section titled “Step 1 — Open the printer page”From the Cashier shell → Settings → Receipt printer (/point-of-sale/settings/printer).
Step 2 — Add a device
Section titled “Step 2 — Add a device”Click + Add device → choose Receipt printer (receipt_printer).
| Field | Required | Notes |
|---|---|---|
| Name | ✓ | Display name in the hub |
| Connect method | ✓ | TCP (LAN), USB (direct), or SYSTEM (OS driver) |
| IP | TCP only | Printer IP on the LAN |
| Port | TCP only | TCP port (usually 9100) |
| Paper size | ✓ | Default 80mm |
| Print template | optional | Link to a ReceiptTemplate created in Dashboard |
Source: device-settings-form.schema.ts.
Step 3 — Enable the device
Section titled “Step 3 — Enable the device”Flip the Enable/Disable toggle to green. Disabled devices never receive a print job.
Step 4 — Activate the bridge (TCP printers only)
Section titled “Step 4 — Activate the bridge (TCP printers only)”For TCP printers, the component checks localPrinterReady (resolveLocalReceiptPrinterConfigReady(device)):
If you want bridge pairing (server-side status sync), click “Activate bridge” → each printer creates a lane code.
canOpenPosBridgeActivate for a printer requires: receipt_printer AND TCP AND IP + port. USB / SYSTEM print locally only.
Receipt print mode
Section titled “Receipt print mode”After the device is ready, set the receipt mode under Store settings → Receipt (in Dashboard):
| Mode | Behaviour |
|---|---|
| Off | Never prints, never prompts |
| Prompt | After tender shows a dialog “Print / Preview / Skip” |
| Auto | Prints immediately after a successful tender (common default) |
Source: ReceiptPrintModeForm (selectable inside the device form).
Expected receipt content
Section titled “Expected receipt content”- Store logo (PNG ≥ 300dpi, uploaded under Dashboard → Branding).
- Header: store name, address, phone.
- Lines: name + quantity + unit price + line total.
- Total + discount + tax (if any).
- Invoice barcode — Code128 from
client_order_id(NOT EAN-13 from numeric id). - Card metadata when paid by card (transaction id, terminal id, card brand).
Common issues
Section titled “Common issues”| Symptom | Fix |
|---|---|
| Nothing prints after tender | Print mode is Off, or device isn’t enabled |
| Preview opens instead of print | Mode is Prompt — cashier must choose Print, not close the dialog |
| Multiple duplicate prints | Don’t click OK on the preview twice — the system treats it as one order |
| Logo blurry / clipped | Re-upload ≥ 300dpi PNG; enable crisp edges in the template |
| Barcode won’t scan | Make sure it’s Code128, not EAN-13 |
| Font clipped / last line cut | Match paper width (80mm) to the actual roll |
Quick troubleshooting
Section titled “Quick troubleshooting”| Scenario | Action |
|---|---|
| Receipt doesn’t print and doesn’t prompt | Verify device enabled + print mode under Store settings |
| Test print OK, real order doesn’t print | Tender flow issue — check the API response for print=true |
| USB not detected | Swap cable / port; on macOS check Privacy & Security → USB |
| TCP drops mid-shift | Ping the printer IP; click Reconnect on the bridge |
See also: FAQ — Print & hardware.
Technical
Section titled “Technical”- Component:
<DeviceSettings hardwareFocus="printers">(DeviceSettings.tsx) - Form:
device-printer-settings-form.tsx - Constants:
device-settings.constants.ts(receipt_printer,CASH_DRAWER_PRINTER_TYPE) - API:
fetchVendorDevicesSettings,patchVendorDevicesSettings