First store setup
I. Overview
Section titled “I. Overview”After you finish registering and the system auto-signs you into the store dashboard, you need to complete a few quick configurations so the store can go live on day one. This page is a ~15-minute step-by-step walkthrough — every step has an inline screenshot, so you can follow along in the UI.
Why configure up-front?
- Avoid rework later — especially timezone, currency, and address, which affect every report and receipt.
- Let cashiers start selling immediately — pair a printer, add an employee, open a shift and you’re running.
- Clean data from day one — reports, stock, and receivables will be accurate from the very first sale.
II. Ordered checklist
Section titled “II. Ordered checklist”| # | Step | Time | Why it matters |
|---|---|---|---|
| 0 | Sign in & land on the dashboard | 30 s | Where everything starts. |
| 1 | Set currency + timezone + address in store settings | 1 min | Affects every report and receipt going forward. |
| 2 | Fill in the receipt header (store name, address, phone) | 2 min | Appears on every printed receipt. |
| 3 | Pair hardware (printer, card terminal, scanner) | 2 min | Cashiers can print and take card payments. |
| 4 | Configure default tax | 2 min | Applies to products without an explicit tax profile. |
| 5 | Add your first employee + cashier role | 1 min | They can sign in to the lane. |
| 6 | Open the POS workspace + run a test sale | 2 min | End-to-end smoke test. |
| 7 | Import your catalog (or add one product manually) | 5 min | You need items to sell. |
Total: ~15 minutes.
III. Step 0 — Sign in and land on the dashboard
Section titled “III. Step 0 — Sign in and land on the dashboard”After registration you land on the store dashboard (the home screen for the owner). This is the screen you see every time you sign in.
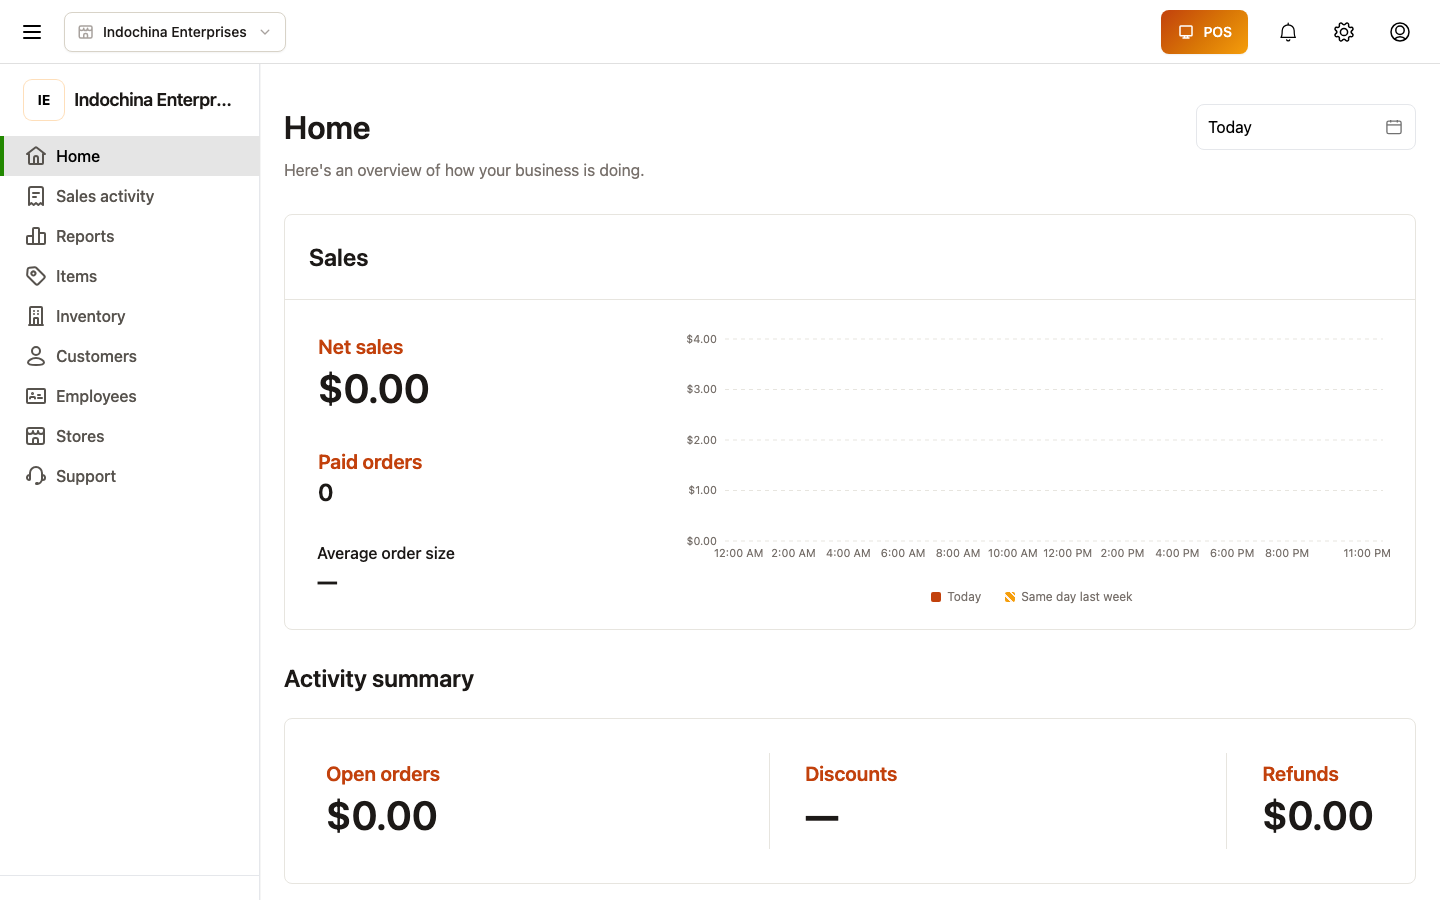
What you see at a glance:
- Today’s sales — net revenue for the day (in the store’s timezone).
- Open shift — is anyone signed in to a register right now?
- Low-stock alerts — items below the reorder threshold.
- Recent orders — the last 10 orders across the day.
- Quick links — shortcuts to the most common actions.
If you don’t see any data yet, that’s expected — this is your first hour on the platform. The numbers fill in as you sell.
IV. Step 1 — Set currency + timezone + address
Section titled “IV. Step 1 — Set currency + timezone + address”Open Settings → General from the sidebar. The General tab is the first place you configure a new store because three values ripple through every report, receipt, and dashboard tile:
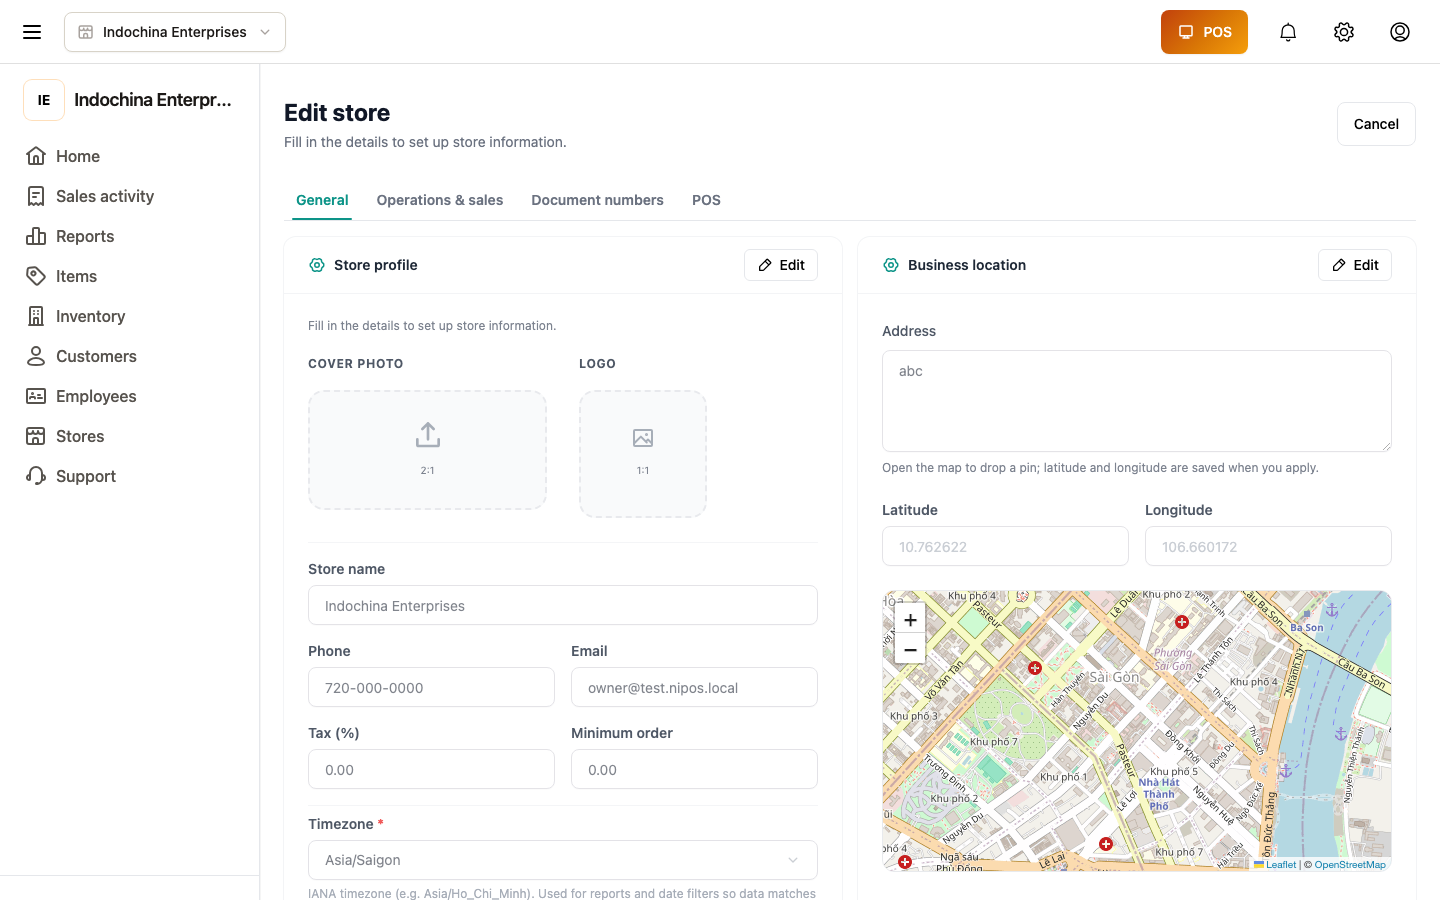
The Settings hub is the launching pad for every per-store config. You’ll return here often.
1.1 — General tab (currency, timezone, address, phone, logo)
Section titled “1.1 — General tab (currency, timezone, address, phone, logo)”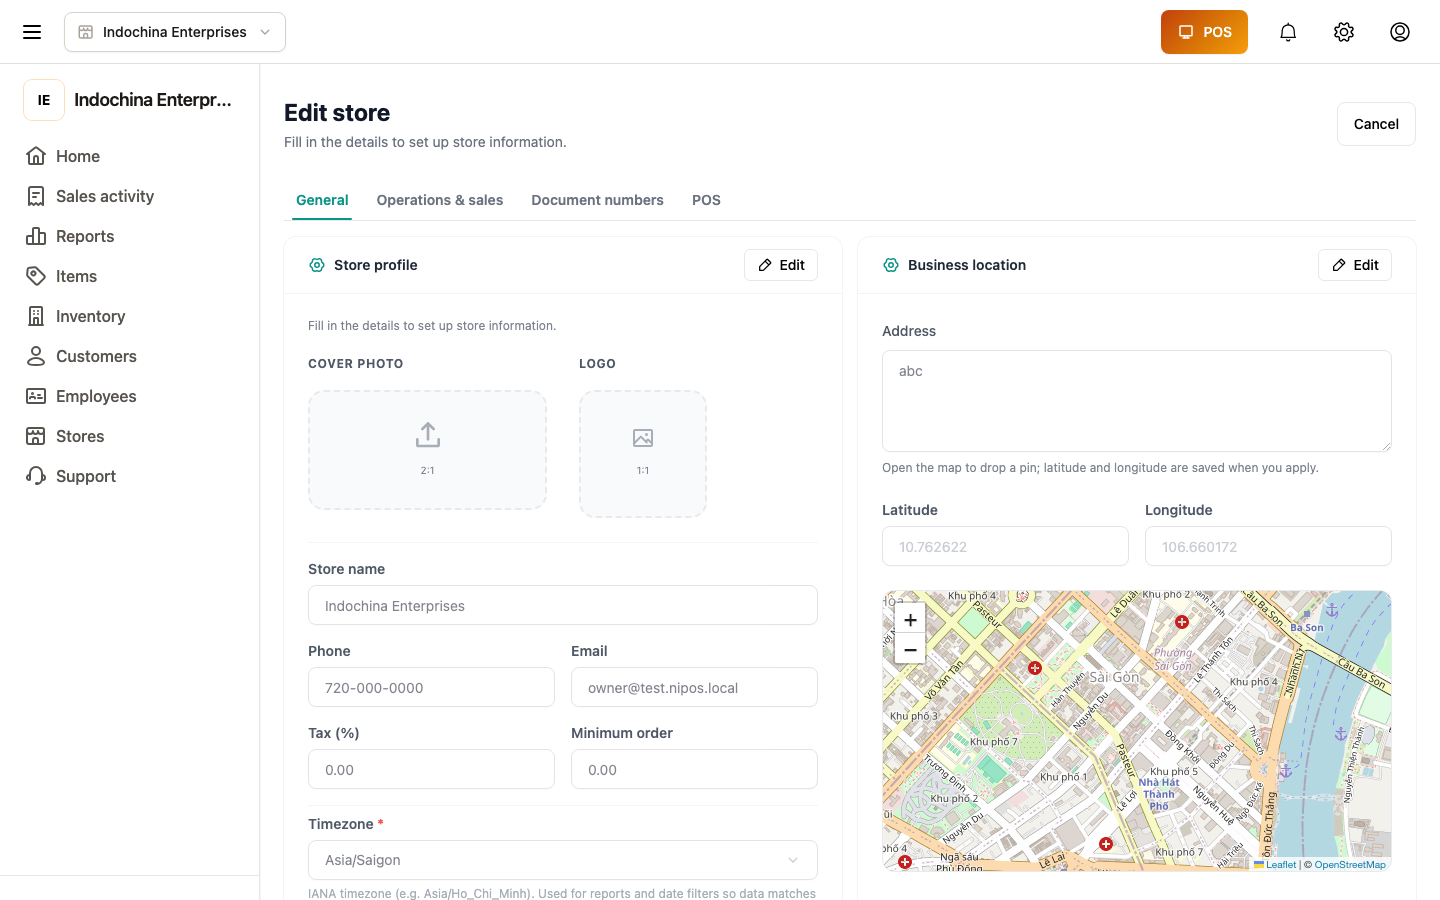
| Field | Why it matters | Tip |
|---|---|---|
| Currency | All totals on receipts, orders, finance reports. | Changing it does not retroactively update old orders. |
| Timezone | Calendar bounds on Sales overview, Finance report, Work shifts. | The store timezone is also the POS workspace default — client-side timezones are ignored. |
| Address | Appears on receipts and tax invoices. | Don’t leave blank — required for invoicing. |
| Phone | Receipt header. | — |
| Logo | Receipt header + invoices. | PNG/JPG, square crop recommended. |
Save with the Save button at the bottom. You’ll see a green toast confirming the change.
V. Step 2 — Fill in the receipt header
Section titled “V. Step 2 — Fill in the receipt header”The receipt header is what the customer sees at the top of every printed slip: store name + address + phone + tax ID. Without it, your receipts look unfinished.
2.1 — Receipt template
Section titled “2.1 — Receipt template”Open Settings → Receipt template.
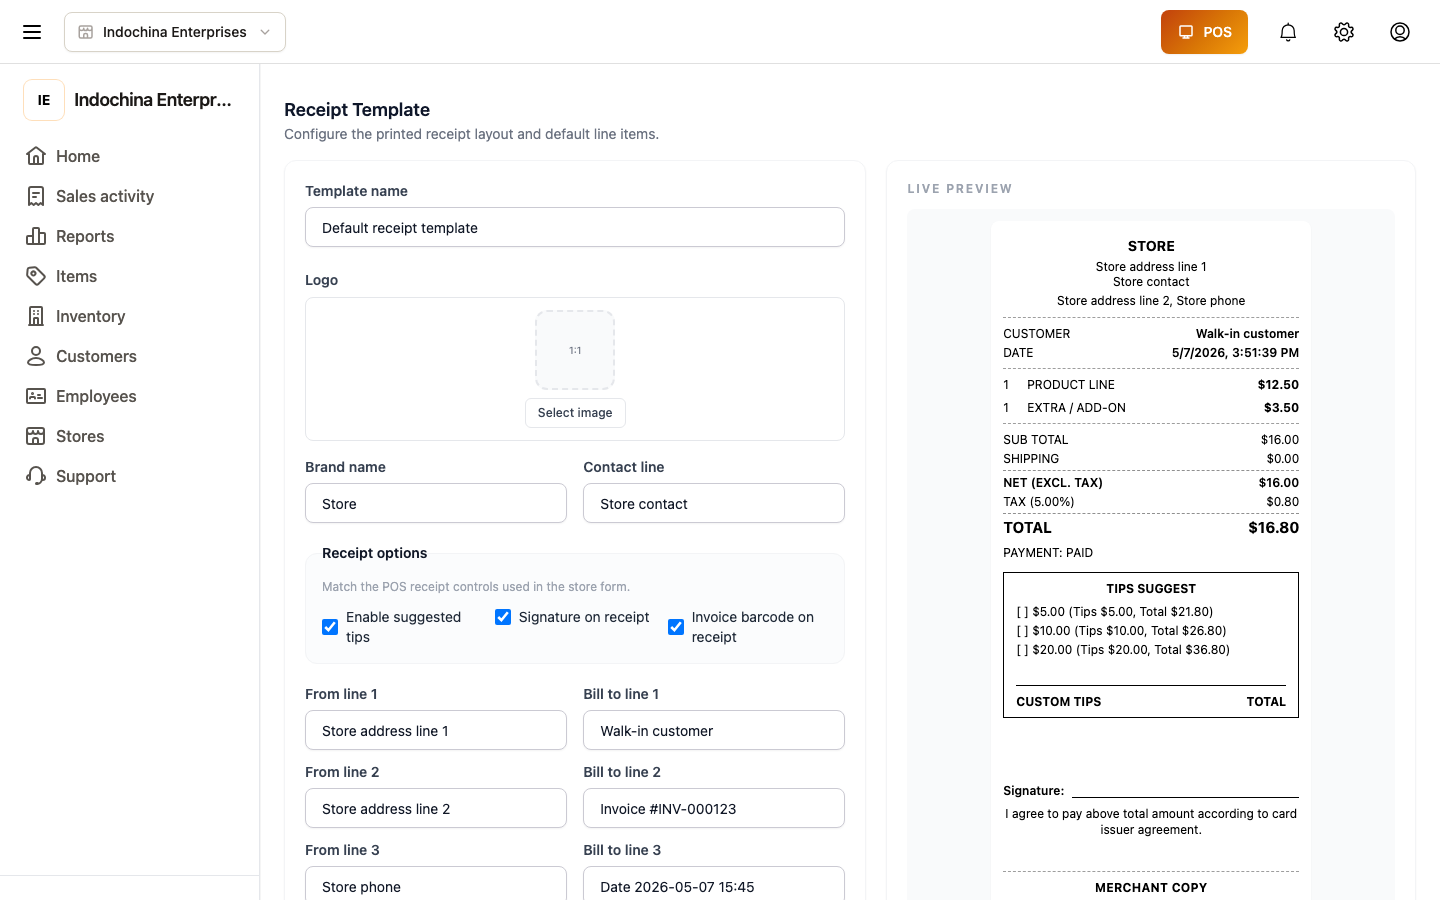
Typical fields:
- Store name (required) — printed in bold at the top.
- Address line 1 / 2 — the street address.
- Phone — printed under the address.
- Tax ID / MST — required if you issue VAT invoices.
- Footer text — the small print at the bottom (e.g. “Thank you for shopping with us!”).
- Logo upload — square PNG/JPG, max 1 MB.
2.2 — Invoice template (related: tax invoices)
Section titled “2.2 — Invoice template (related: tax invoices)”If you issue VAT invoices to B2B customers, also configure the invoice template:
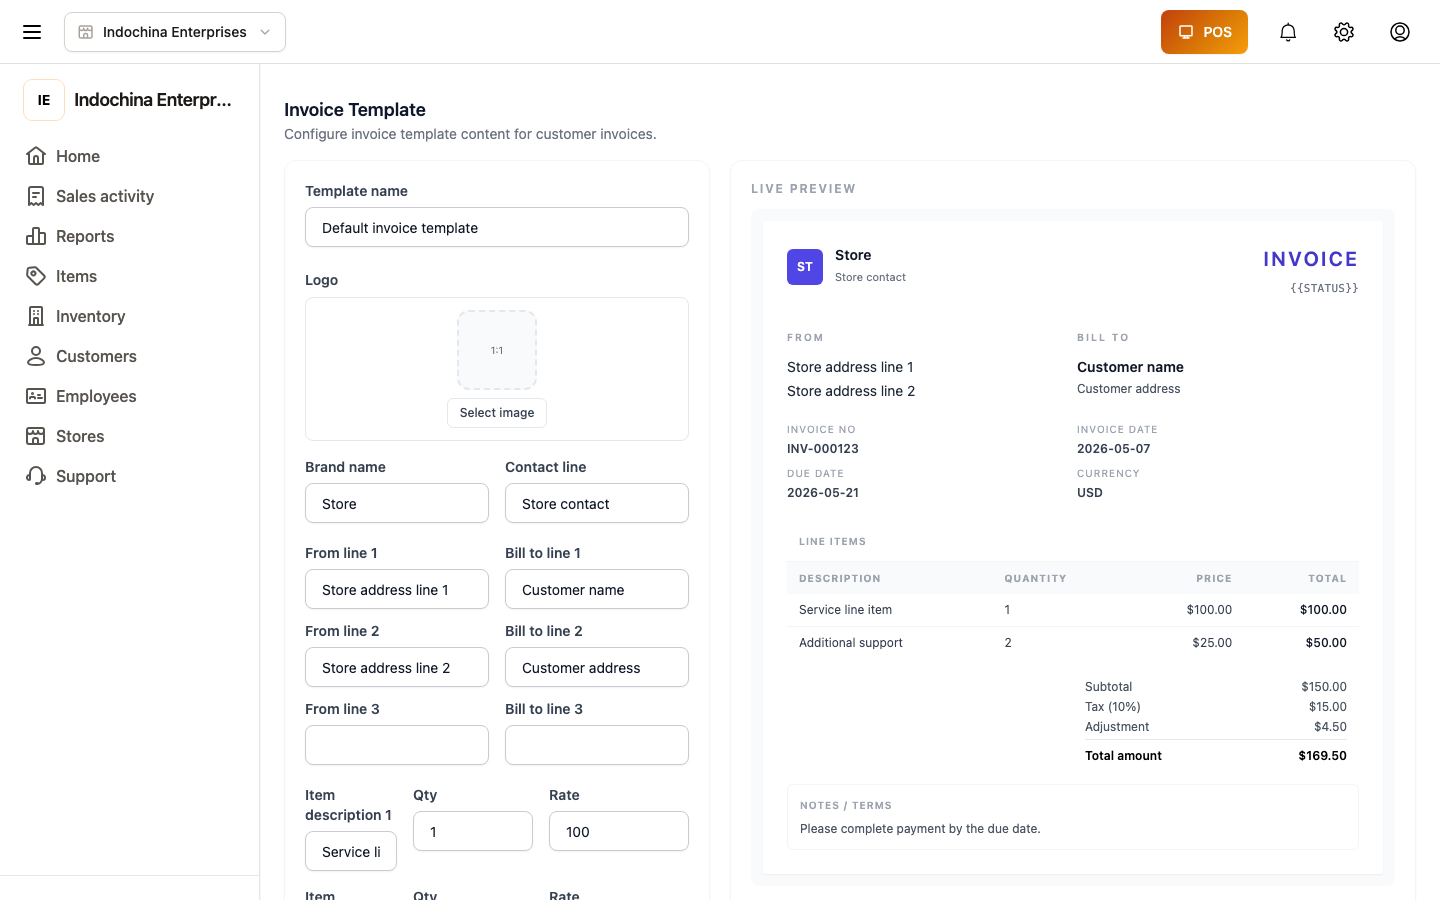
Both templates share the same field set — the difference is when they print (every POS slip vs only B2B invoices).
VI. Step 3 — Pair hardware
Section titled “VI. Step 3 — Pair hardware”You can pair hardware either from the dashboard (Settings → Devices) or from the POS workspace (Settings → Devices). Both surfaces use the same backend (/api/v1/vendor/settings/devices).
3.1 — Devices settings (overview)
Section titled “3.1 — Devices settings (overview)”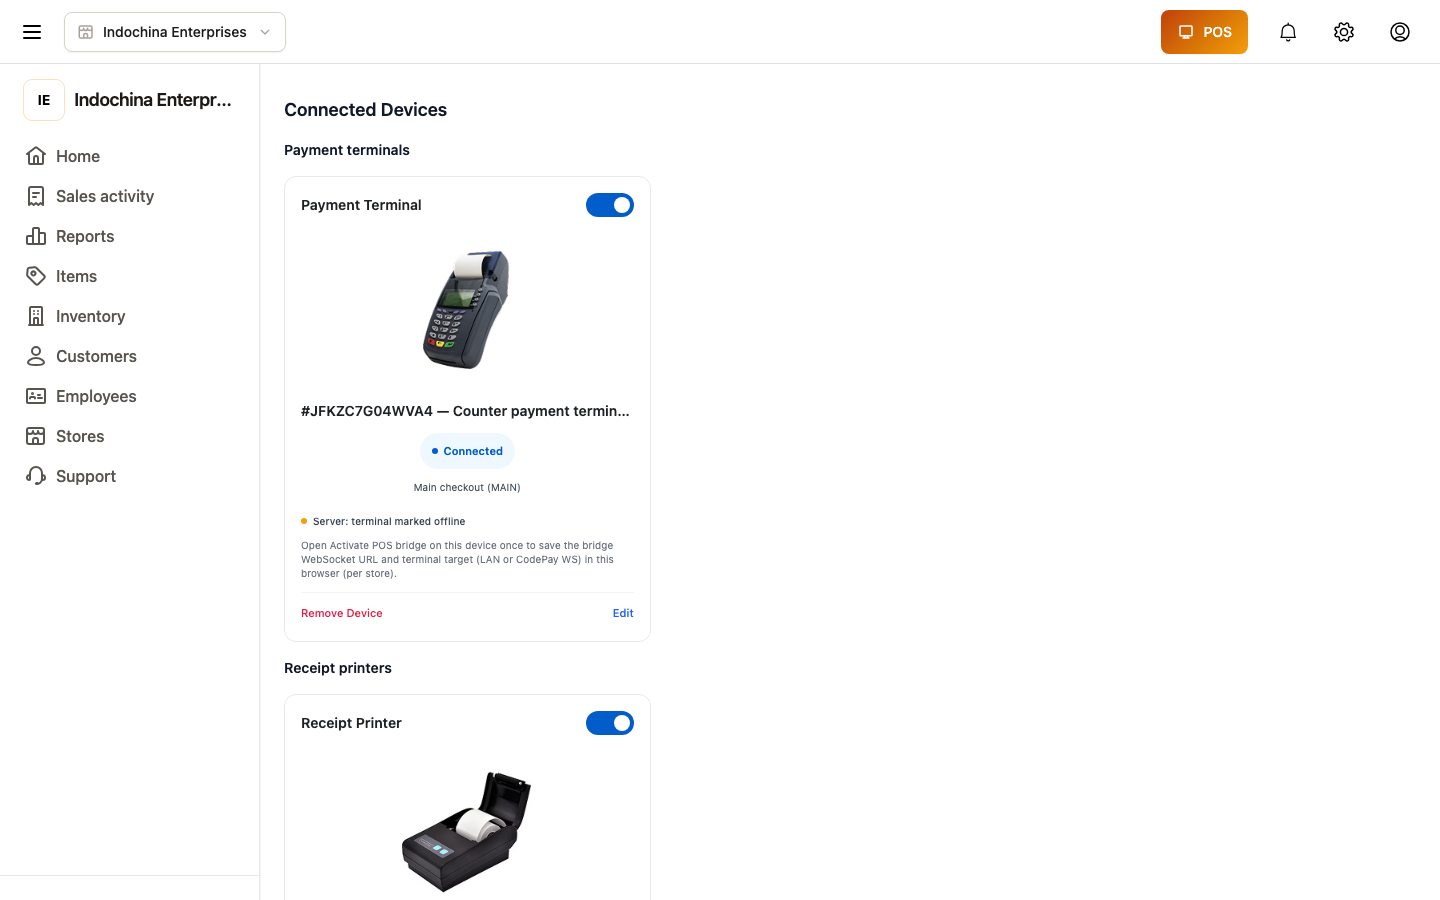
This is the hardware hub. Each device card shows:
- The device name and model.
- A status badge — green = connected, yellow = idle, red = error.
- An action menu (3-dot) to edit, test, or unpair.
3.2 — Pair the receipt printer
Section titled “3.2 — Pair the receipt printer”The receipt printer is the device you absolutely need before going live. Click the printer card in the Devices list, or use + Add device → Receipt printer.
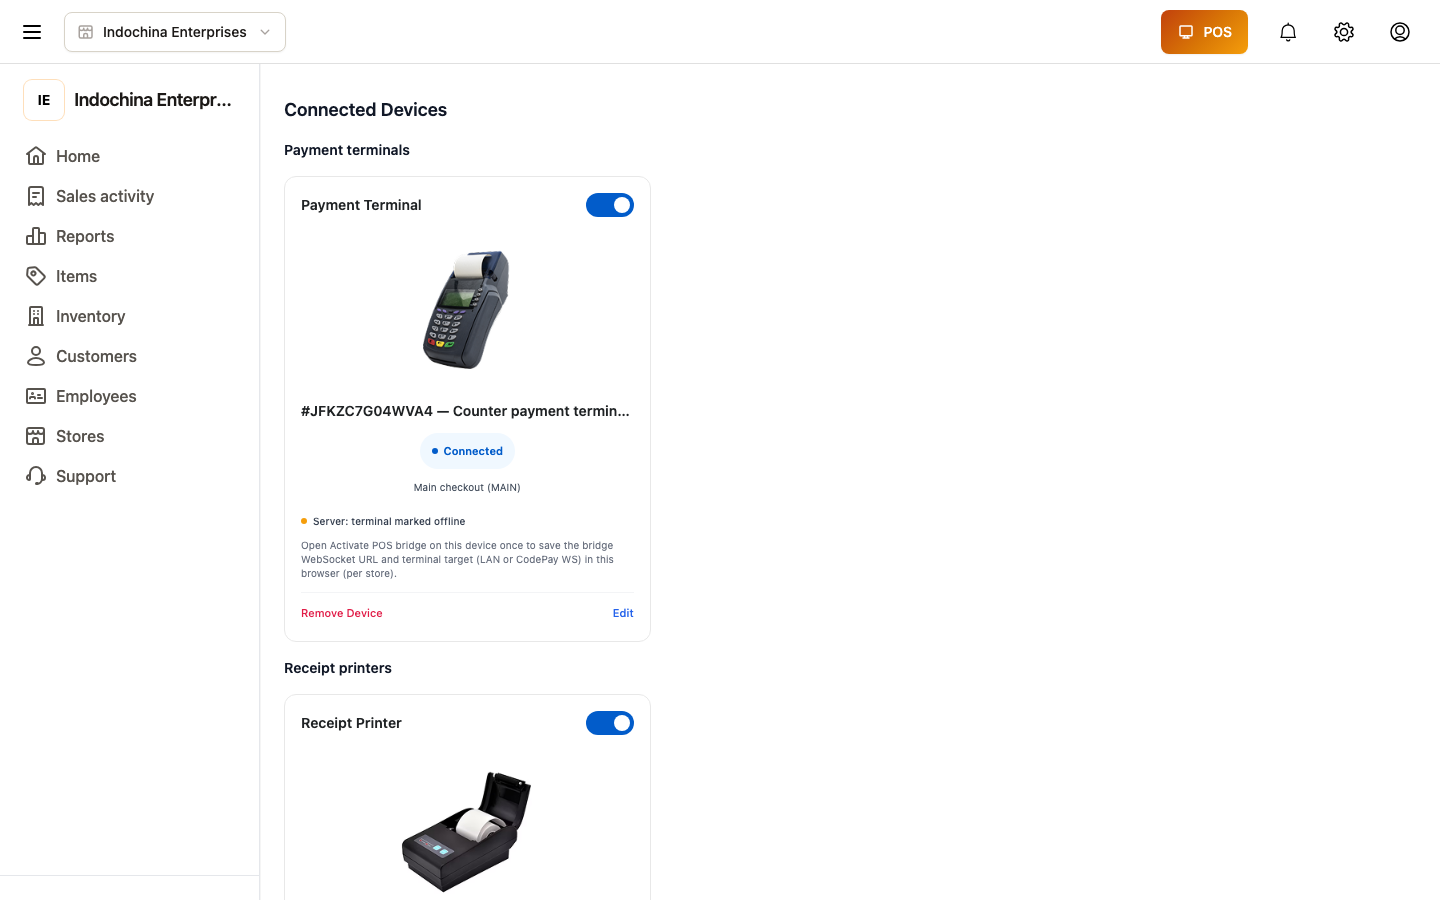
Fill in:
- Connection type — LAN (IP) / Bluetooth / USB.
- IP address + port — for LAN printers.
- Paper width — typically 58mm or 80mm.
- Test print — click the button; a slip should emerge.
The system pings the device before saving — no more wondering whether the printer is “actually” on the network. If the ping fails, the badge turns red with the reason.
3.3 — Pair the card terminal
Section titled “3.3 — Pair the card terminal”If you take card payments, pair the PAX / CodePay / Stripe terminal.
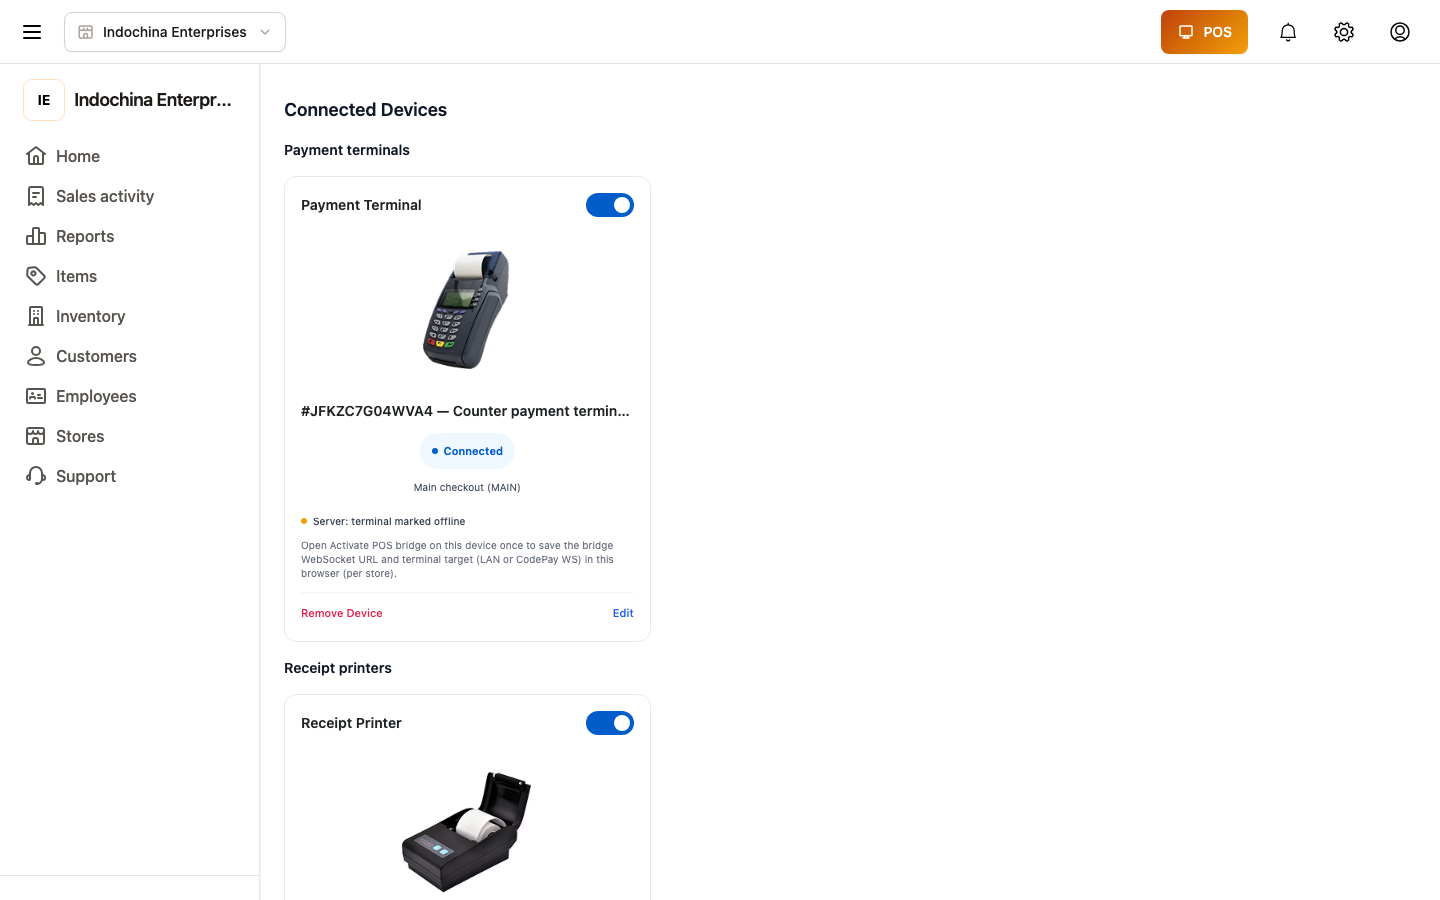
| Field | Why |
|---|---|
| Brand | PAX / CodePay / Stripe — picks the pairing protocol. |
| Terminal ID | The serial number on the back of the device. |
| Relay kind | pax_lan (PAX over LAN) or codepay_ws (CodePay WebSocket) — these are the two supported transports. The UI distinguishes them so you don’t pick a wrong one. |
| Test charge | Initiates a 0-amount authorize → capture to verify end-to-end. |
3.4 — POS bridge (the WebSocket relay)
Section titled “3.4 — POS bridge (the WebSocket relay)”The POS bridge is the local relay that forwards the WebSocket from the dashboard to the hardware on your network. It runs on the Vendor Desktop (Electron) or as a small headless agent.
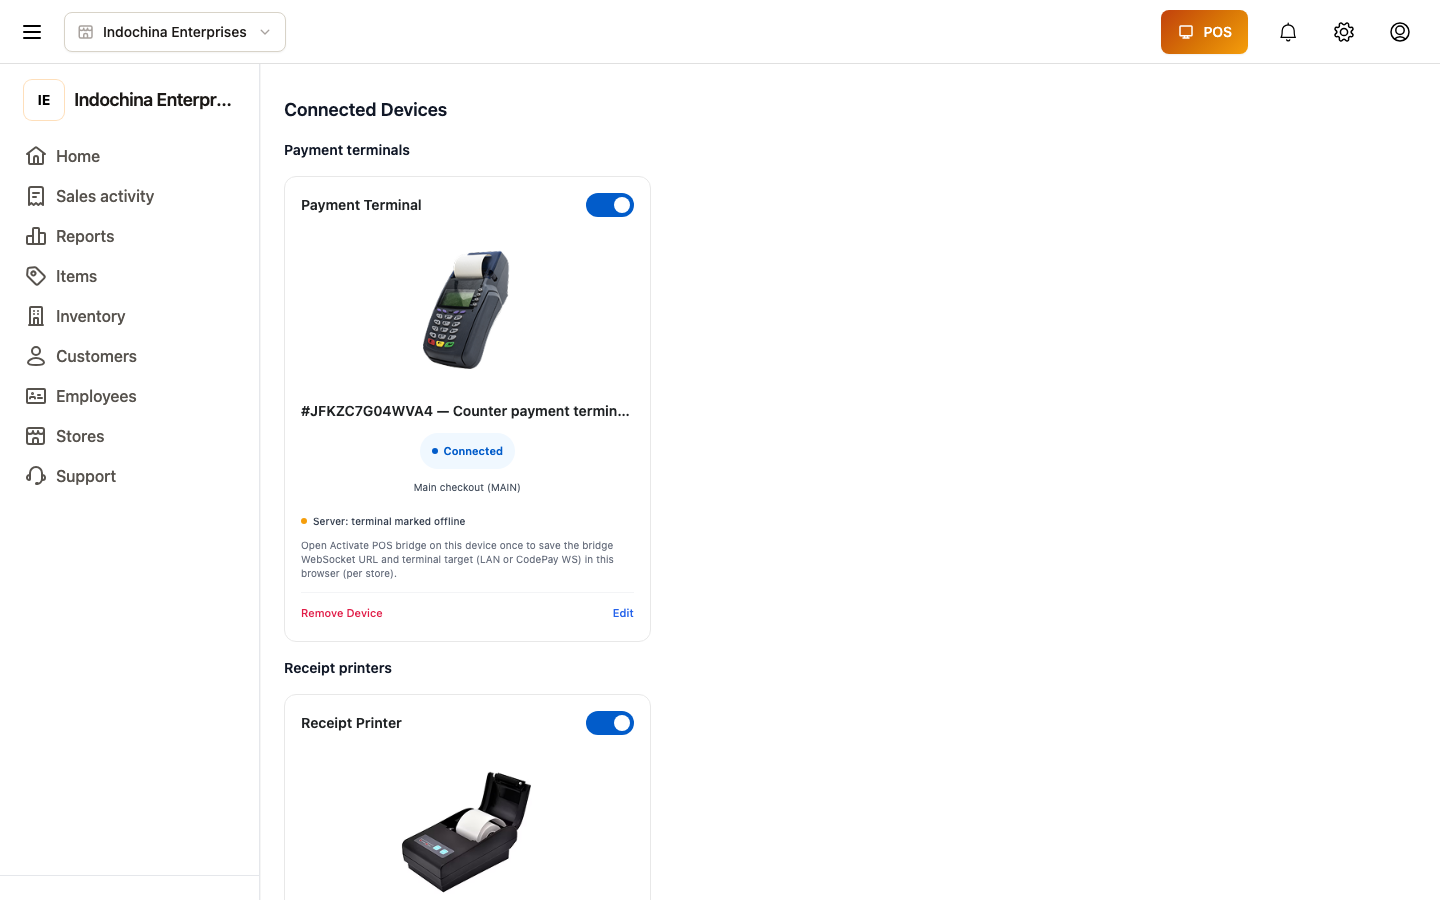
Status legend:
- Green dot + “Connected” → bridge alive, paired terminals reachable.
- Yellow dot + “Idle” → bridge alive, no terminals currently talking.
- Red dot + “Disconnected” → bridge offline; receipts/charges will fail until it returns.
If the dot is red, restart the bridge on the desktop machine. See POS bridge & ECR Hub for the full troubleshooting.
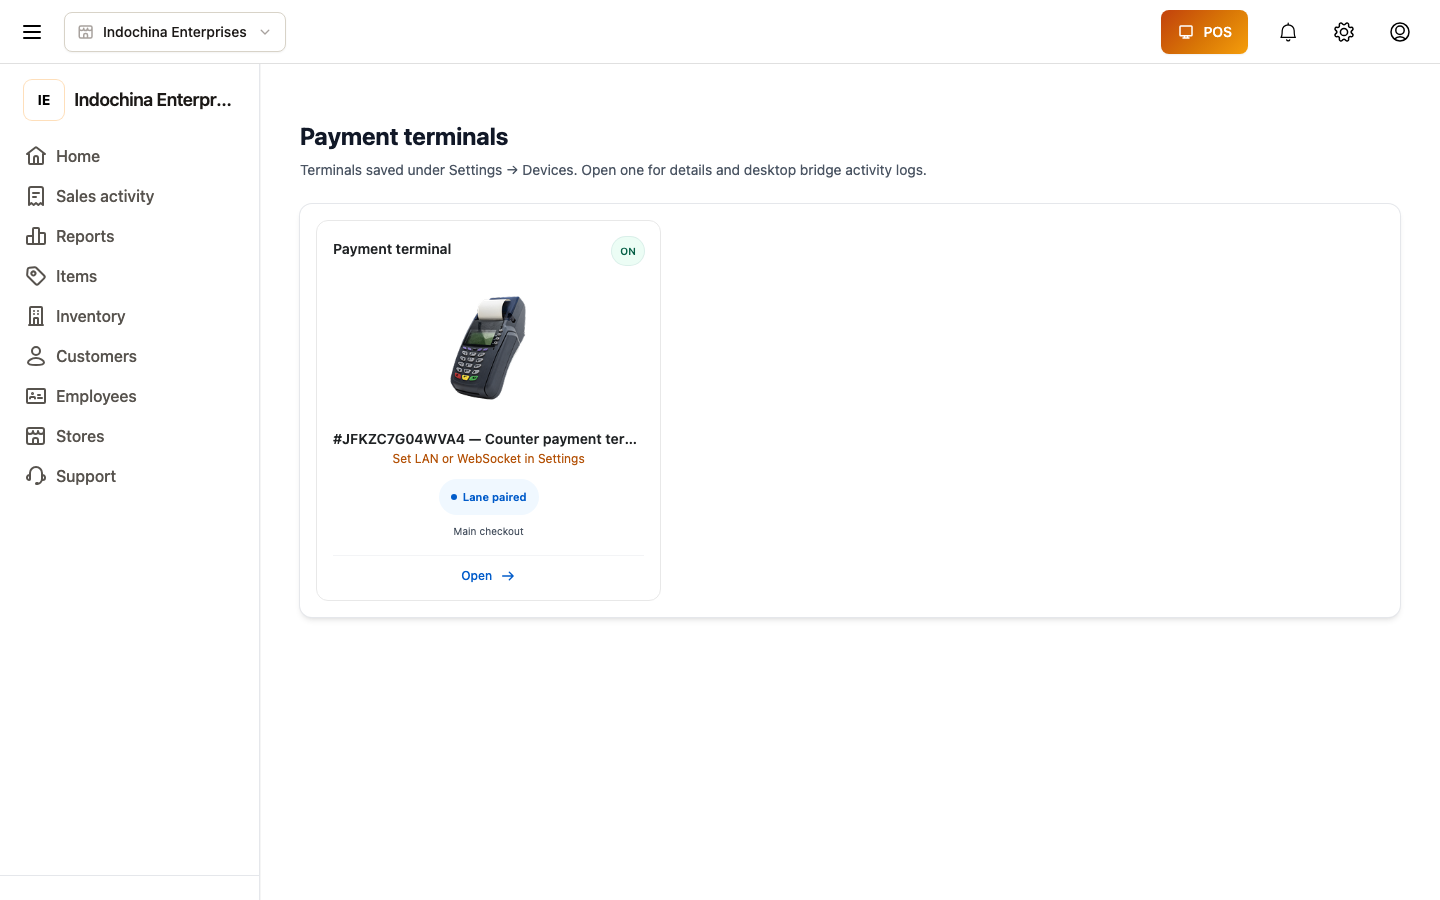
3.5 — Terminals list (advanced)
Section titled “3.5 — Terminals list (advanced)”For multi-terminal setups, the terminals list gives a tabular view of every paired device across all stores:
| Device | Pairing guide |
|---|---|
| Receipt printer | Receipt printer |
| Card terminal (PAX / CodePay / Stripe) | Card terminal |
| POS bridge (terminal WebSocket) | POS bridge & ECR Hub |
| Cash drawer + scale + customer display | Scale, drawer & customer display |
VII. Step 4 — Configure the default tax
Section titled “VII. Step 4 — Configure the default tax”Open Settings → View all settings → Business operations → Taxes and fees
(/dashboard/items/taxes) to create the tax profiles your store applies
(VAT 8%, VAT 10%, zero-rated, exempt…).
The same screen is reachable from any page via the Settings entry in the left rail of the dashboard header — pick View all settings, then open the Taxes and fees card under Business operations.
4.1 — Taxes list
Section titled “4.1 — Taxes list”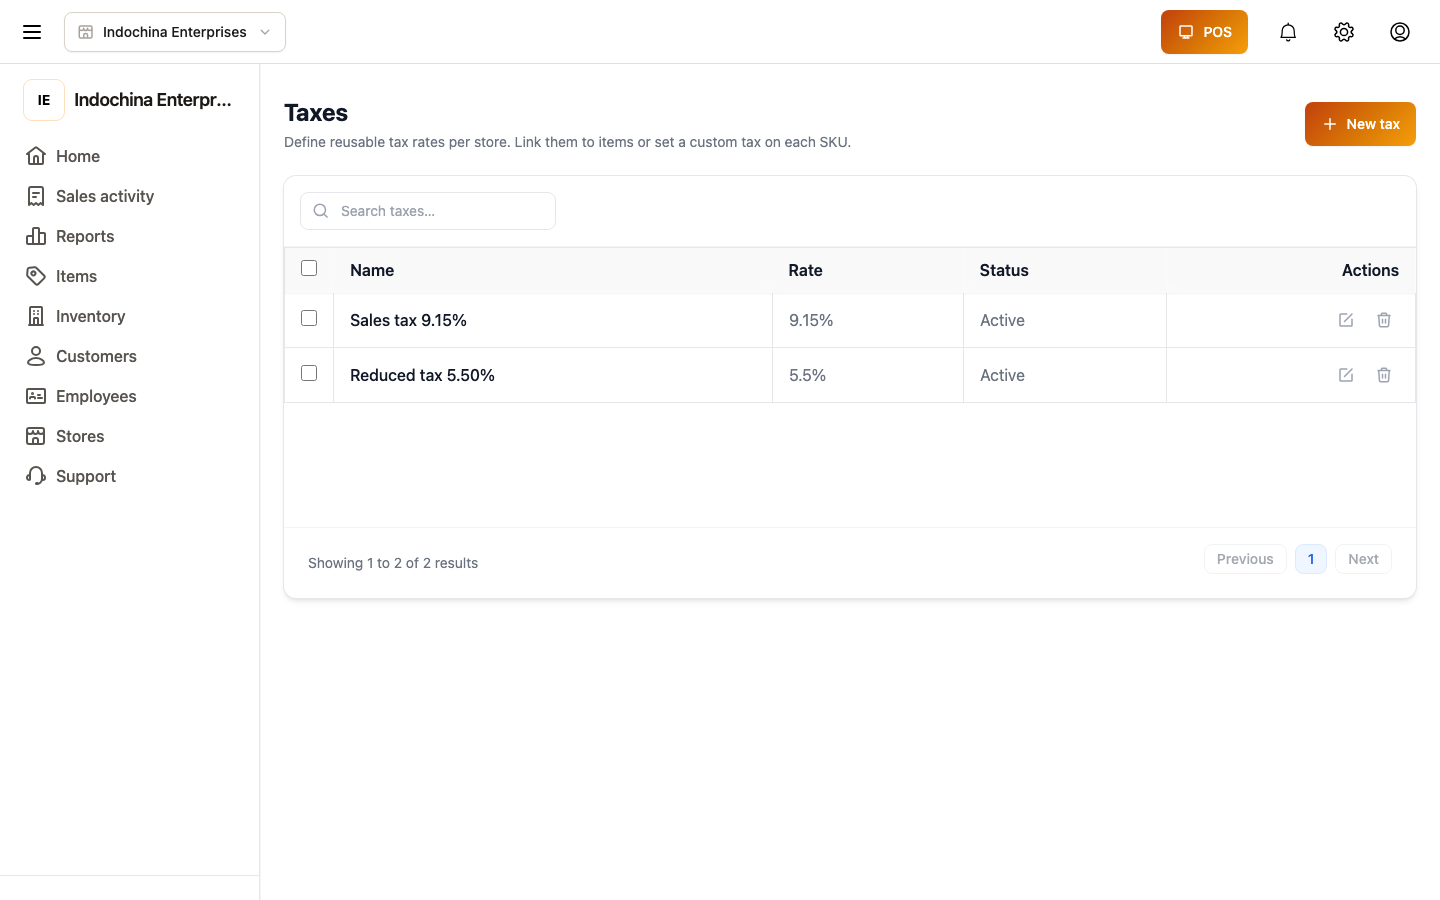
The list shows every tax profile your store can apply. Each row shows:
- Tax name (e.g. “VAT 10%”) — click it to open the tax detail page.
- Rate — either a percentage (e.g.
10%) or a fixed amount depending on the rate type. - Store — which store the tax profile is scoped to, or All stores when the profile is shared.
- Status —
ActiveorInactive. Inactive taxes are kept in the catalog but stop being applied to new orders. - Actions — ✏️ Edit (re-opens the create form in edit mode) and 🗑️ Delete.
4.2 — Create a new tax profile
Section titled “4.2 — Create a new tax profile”Click + New tax. A modal opens with the create form.
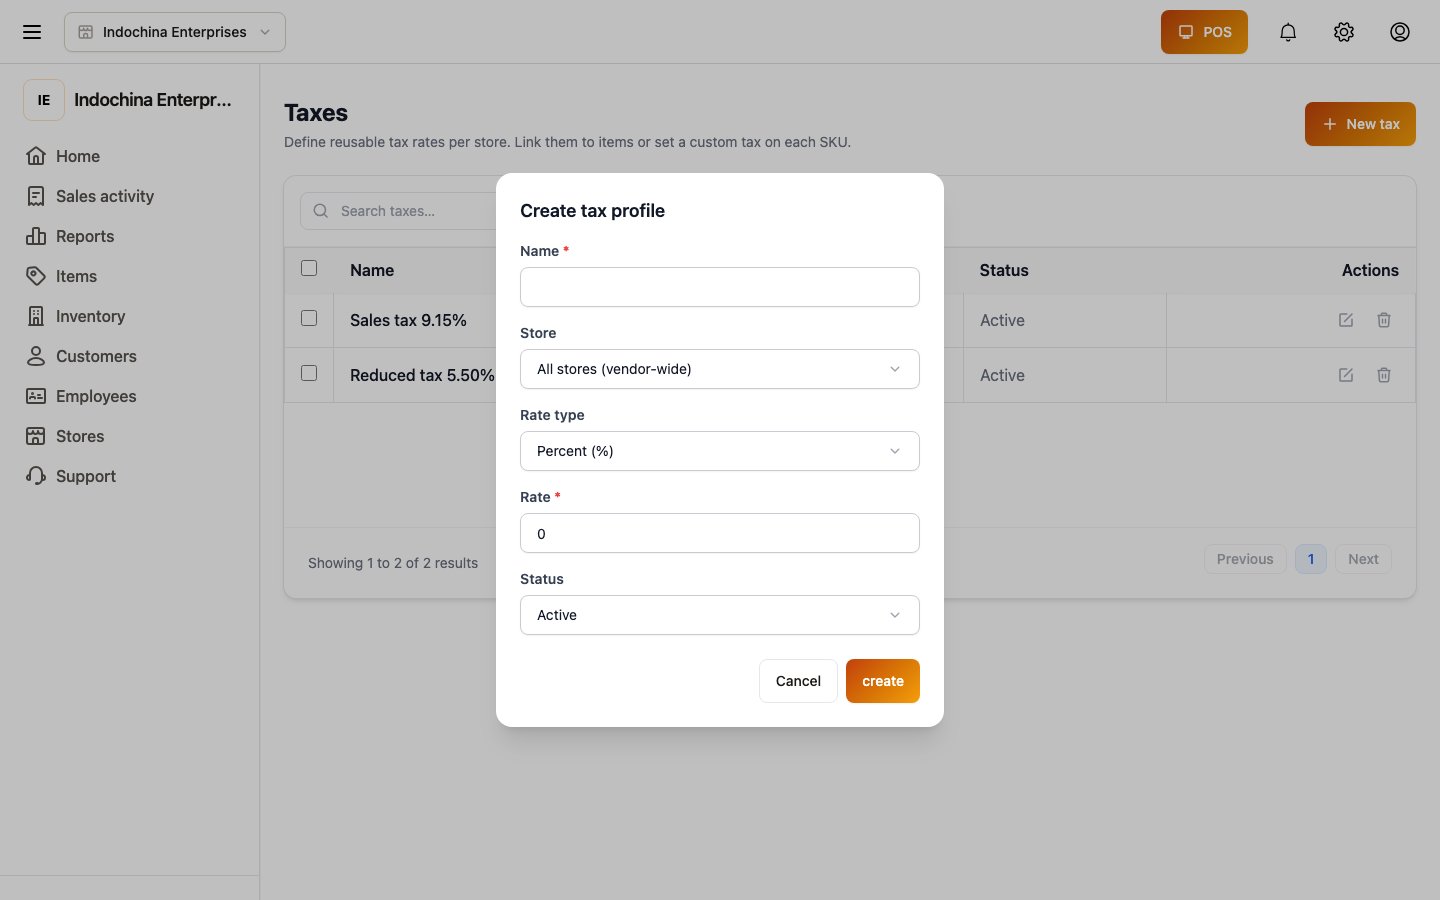
Required fields:
- Name — internal label (e.g. “VAT 8%”).
- Store — which store this tax profile applies to. Pick a specific store, or leave it on All stores to share the profile across the whole account.
- Rate type —
Percentage(e.g. 10%) orFixed amount(a currency value). - Rate value — numeric value, up to four decimals. For a percentage, the
UI shows it as
10%in the list; for a fixed amount it shows the raw number. - Status —
Active(the tax can be assigned to products right away) orInactive(kept for later).
Save → the new tax appears in the list with status active.
How taxes attach to products:
- When creating a product, you assign a tax profile to it (or leave it empty to use the store default).
- The system does not pick a “default tax” at the tax-profile level — the default fallback is configured per product on the Taxes and fees section of the product form (see the Items and catalog guide).
- Finance reports separate gross revenue (incl. tax) from tax remitted;
open Finance → Taxes report (
/dashboard/finance/taxes) to inspect the per-rate totals.
See: Settings hub → Business operations → Taxes and fees.
VIII. Step 5 — Add your first employee
Section titled “VIII. Step 5 — Add your first employee”You (the owner) can do everything yourself, but if you’ll have a cashier, add them now.
5.1 — Employees list
Section titled “5.1 — Employees list”Open Employees (/dashboard/employees). This is the master list of everyone with access to the store.
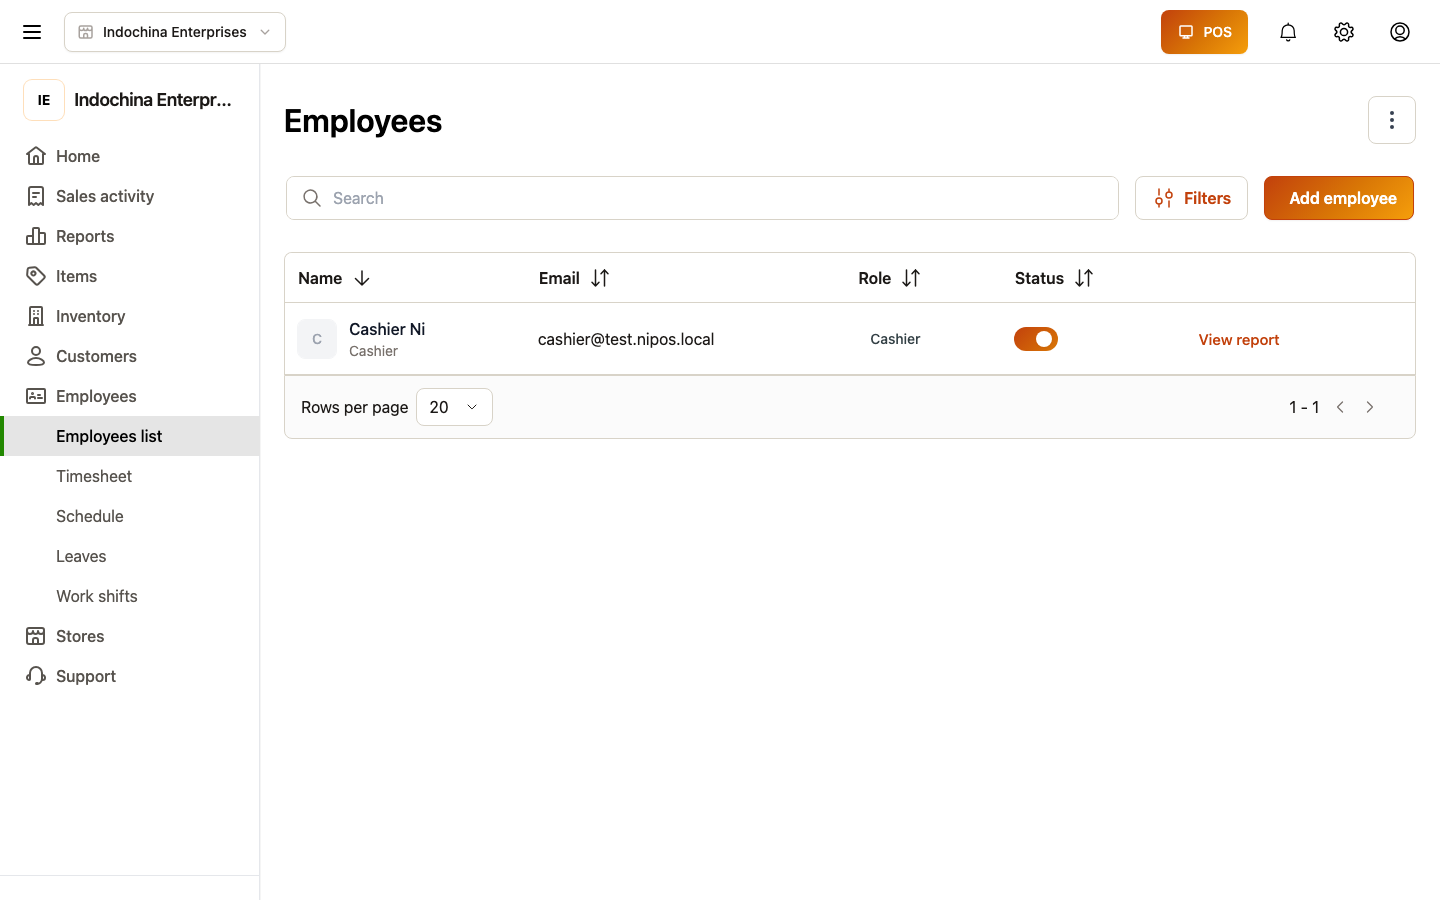
Each row shows:
- Name + email.
- Store they work at (for multi-store accounts).
- Role (Cashier, Manager, Owner).
- Status (Active / Invited / Suspended).
- Last sign-in timestamp.
5.2 — Create employee form
Section titled “5.2 — Create employee form”Click + New employee. A form opens.
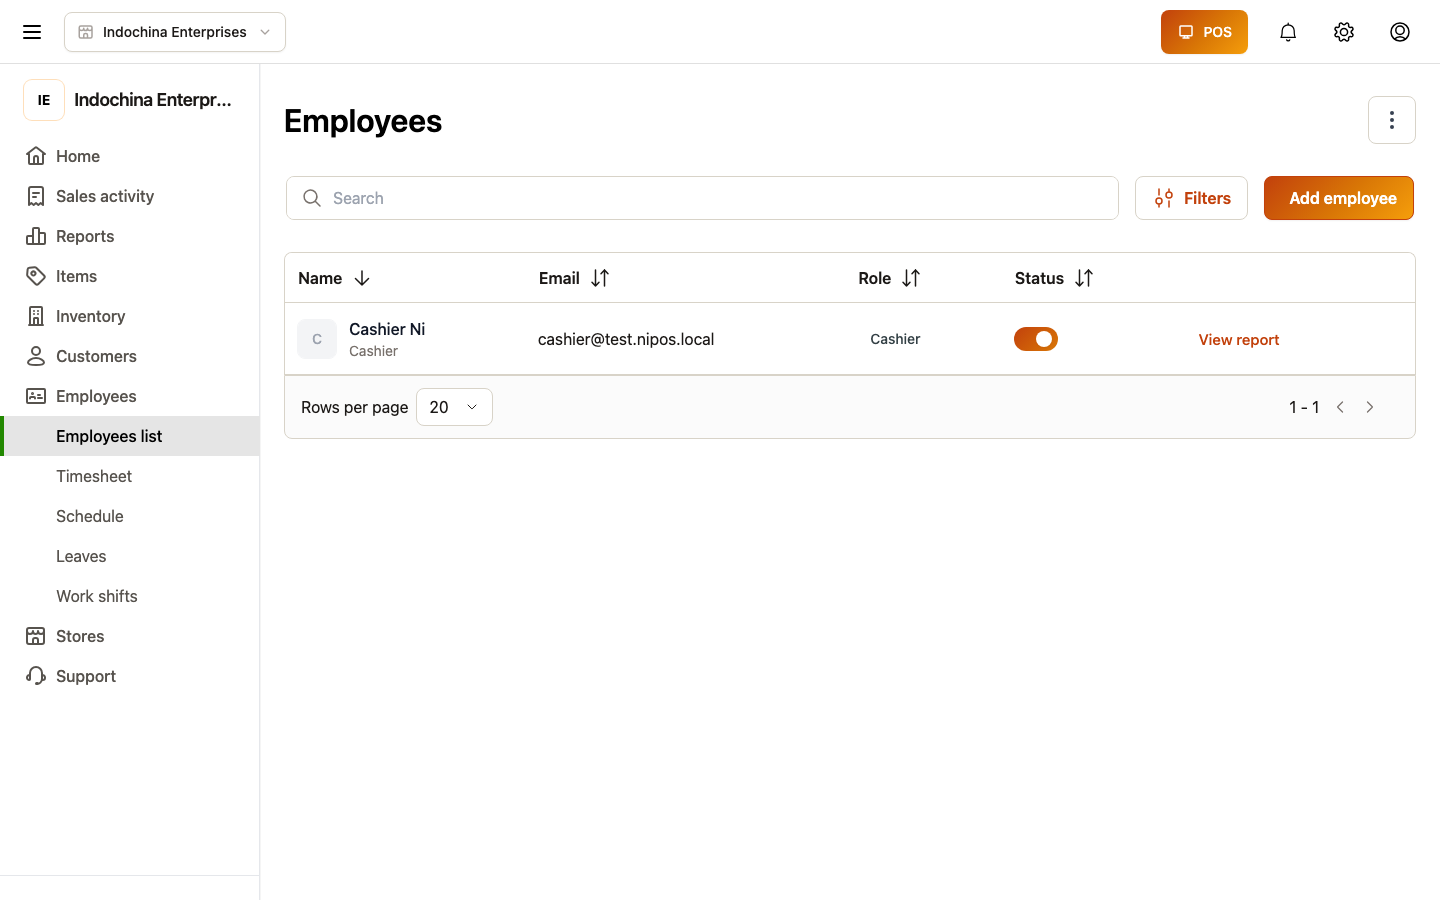
Fill in:
- Name (required) — full name as it should appear on receipts they process.
- Email (required) — the system emails a temp password here.
- Phone (optional) — for SMS reminders.
- Store (required) — which store they work at. For multi-store accounts, this is enforced on sign-in.
- Role (required) — pick Cashier for sales-floor staff. The role preset determines what screens they see and what mutations they can perform.
- Send invite email (default on) — the system sends a magic link with the temp password.
5.3 — Roles (the Cashier preset)
Section titled “5.3 — Roles (the Cashier preset)”The Roles screen lists every role the system supports. The Cashier preset is a read-only + POS-only role designed for sales floor.
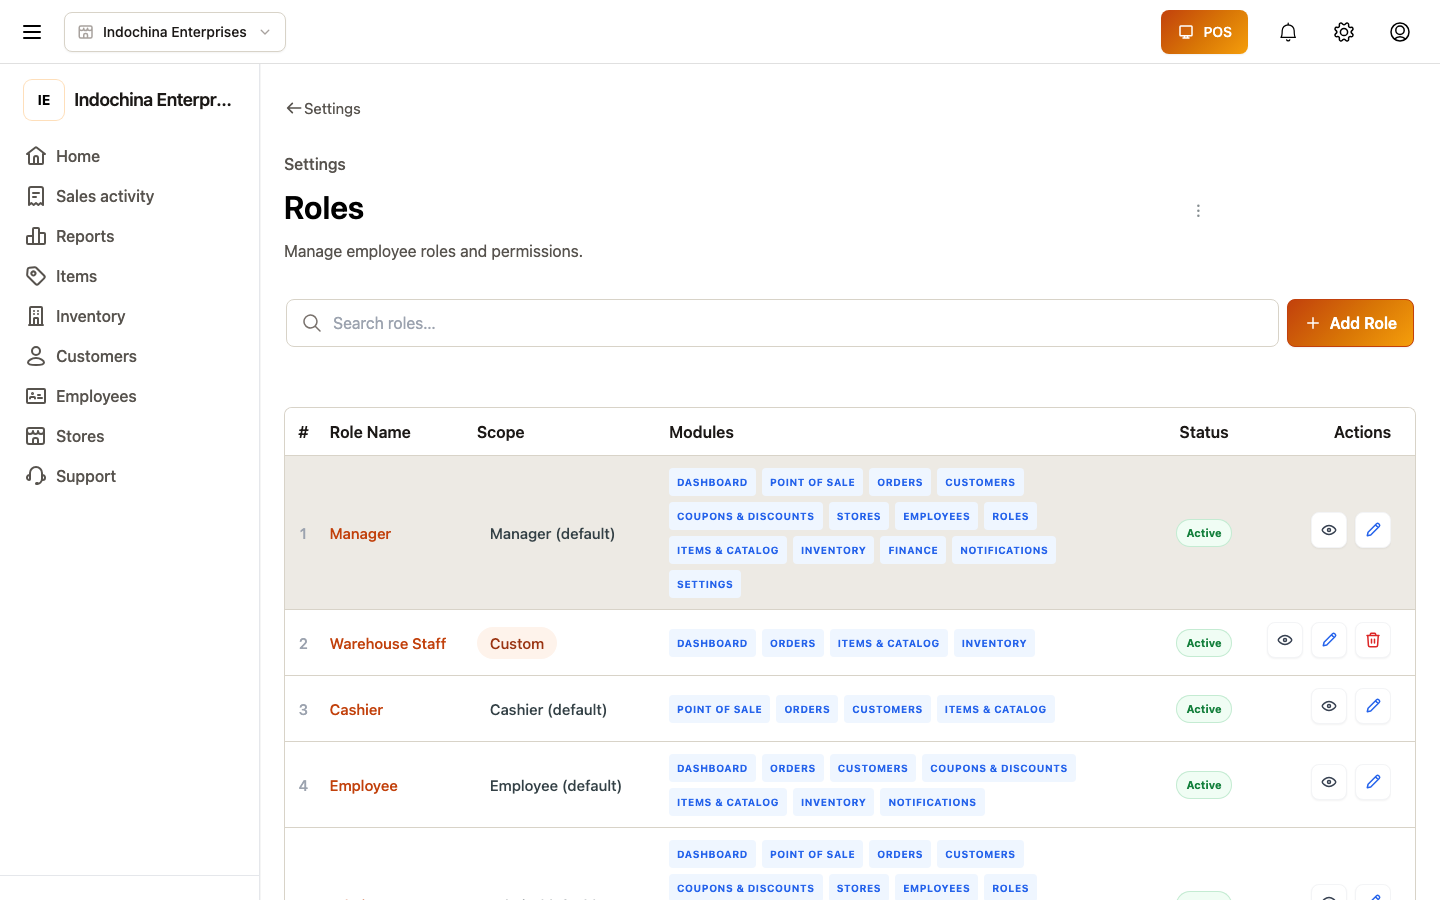
What the Cashier preset can do:
- ✅ Sign in to the POS workspace (
/point-of-sale/sale). - ✅ Open / close their own work shift.
- ✅ Take orders, take payments, print receipts.
- ✅ Open the cash drawer (if paired).
- ❌ Access the dashboard (no
/dashboard/...routes). - ❌ Edit products, employees, or settings.
- ❌ Issue refunds over a configured threshold (must request manager approval).
After saving, the employee receives an email with their temp password. They sign in → land on /point-of-sale/sale.
Full walkthrough: Employees and stores → “Add a new employee”.
IX. Step 6 — Run a test sale (smoke test)
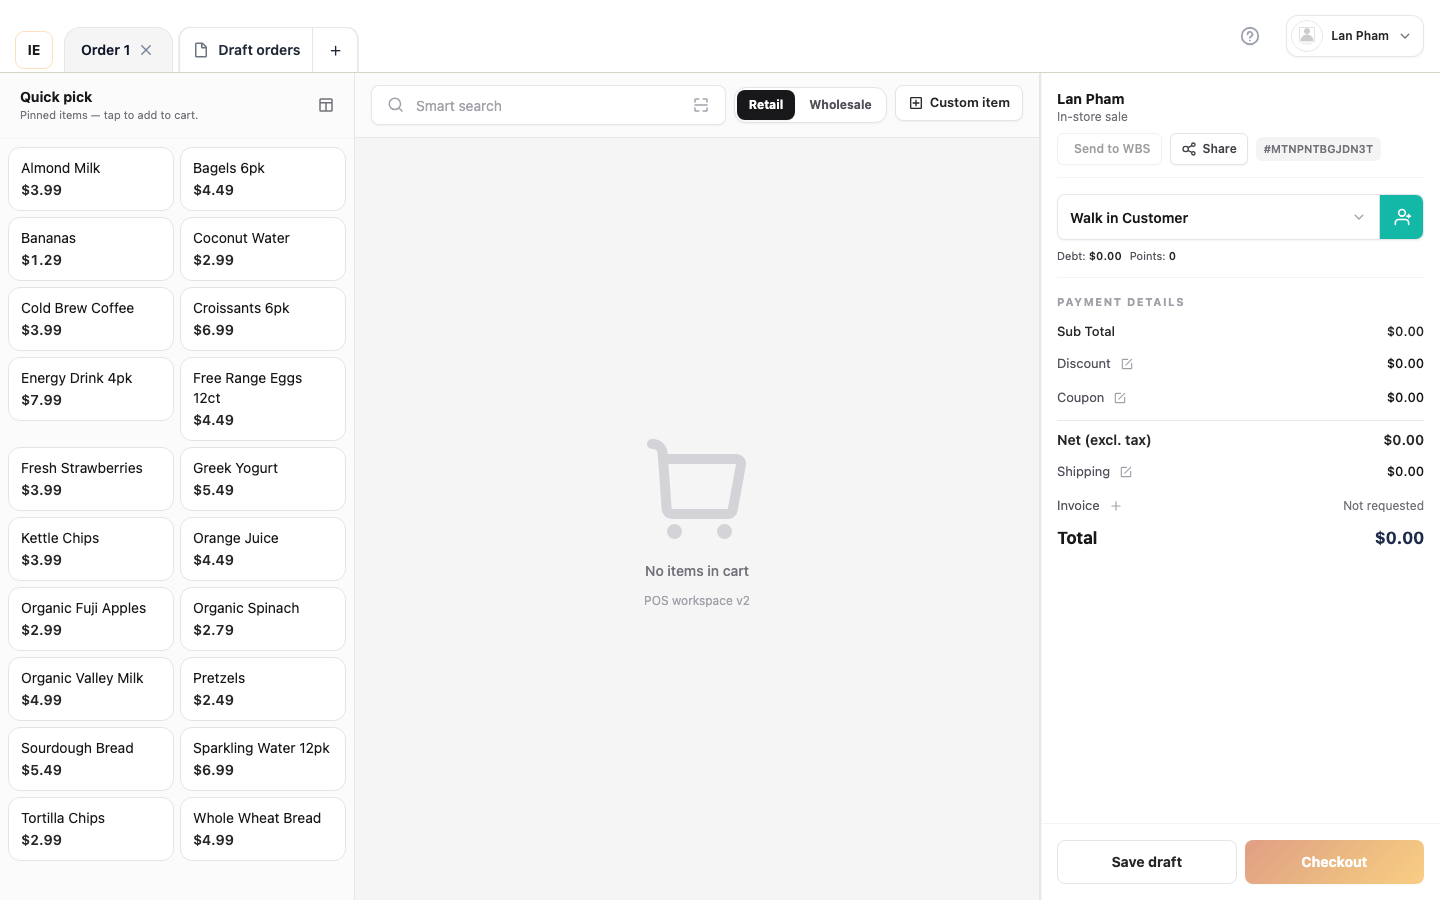
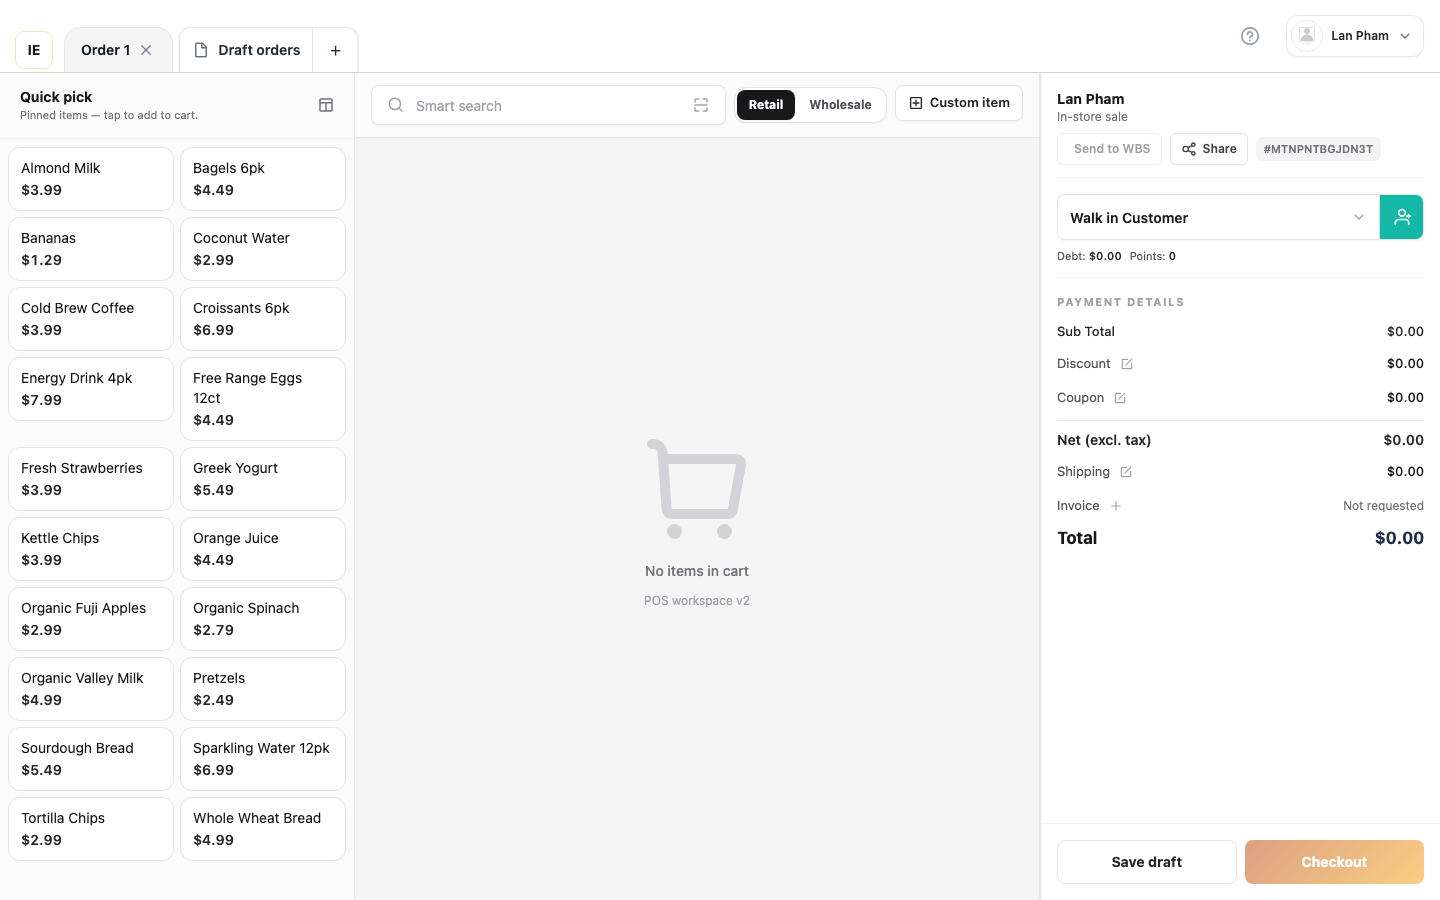
Section titled “IX. Step 6 — Run a test sale (smoke test)”Before you call the store “live”, take one test sale end-to-end. The smoke test exercises the POS Workspace → checkout → receipt path that cashiers use for every transaction.
6.1 — POS workspace (the cashier’s home screen)
Section titled “6.1 — POS workspace (the cashier’s home screen)”A cashier signs in to POS Workspace at /point-of-sale/sale. This is the screen they see for every sale.
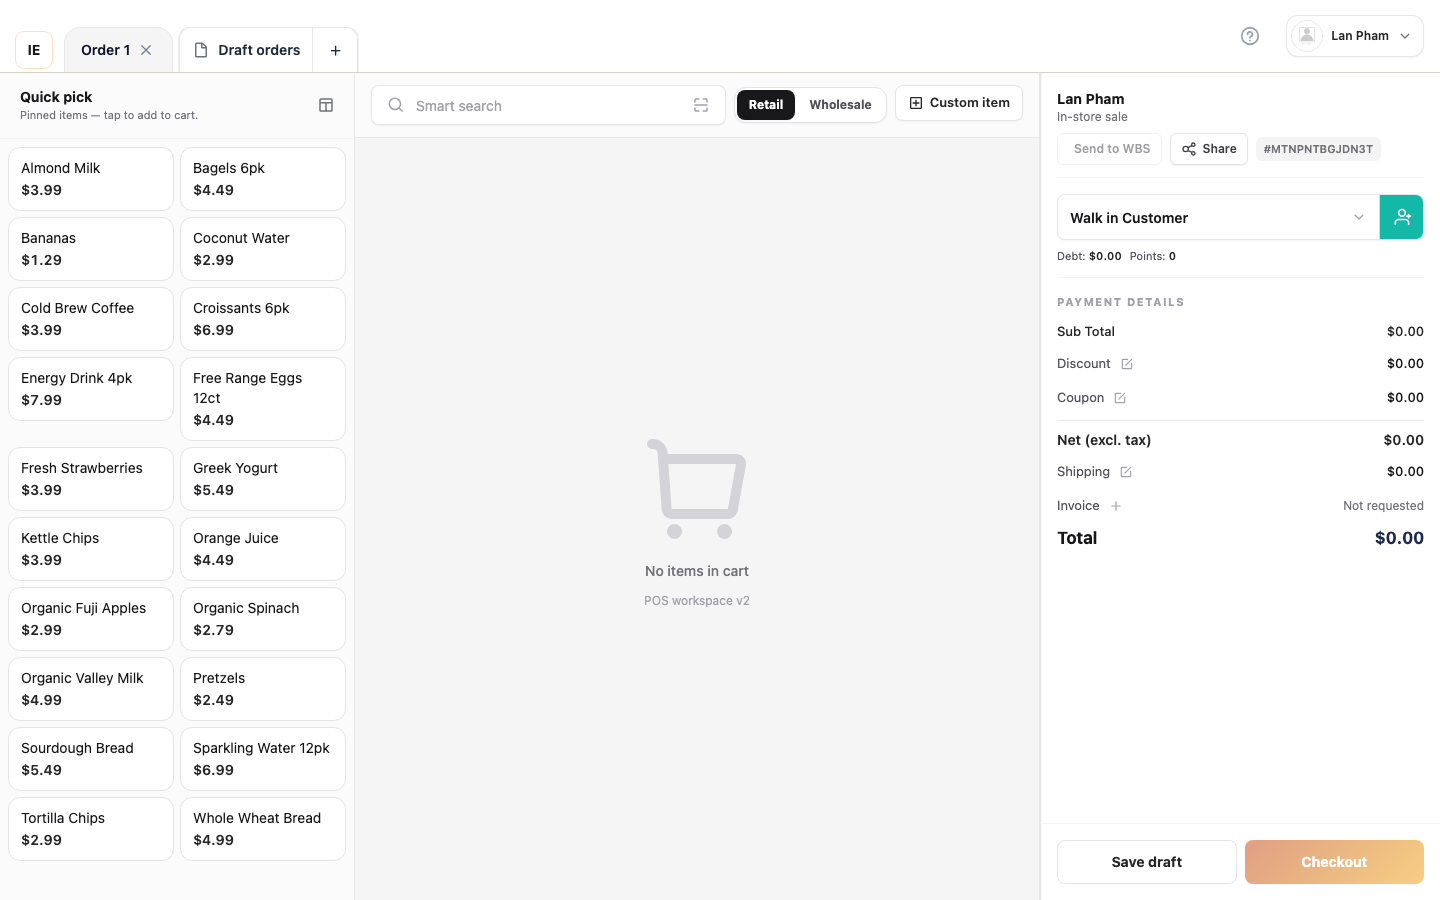
What you see:
- Left — product catalog (categories on top, items below) or the scanner mode.
- Center / right — the cart with line items, qty, discount, total.
- Top bar — store selector + lane selector + sign-out.
- Bottom of cart — Quick add (for ad-hoc lines without scanning) and Checkout button.
The Checkout button is disabled while the cart is empty — add at least one line before it activates.
6.2 — Pick a product (or scan) → cart fills → Checkout enables
Section titled “6.2 — Pick a product (or scan) → cart fills → Checkout enables”Click any product tile (or scan a barcode / type a SKU). One line appears in the cart with qty = 1, unit price, line total. Adjust the qty with the + / − stepper or type directly.
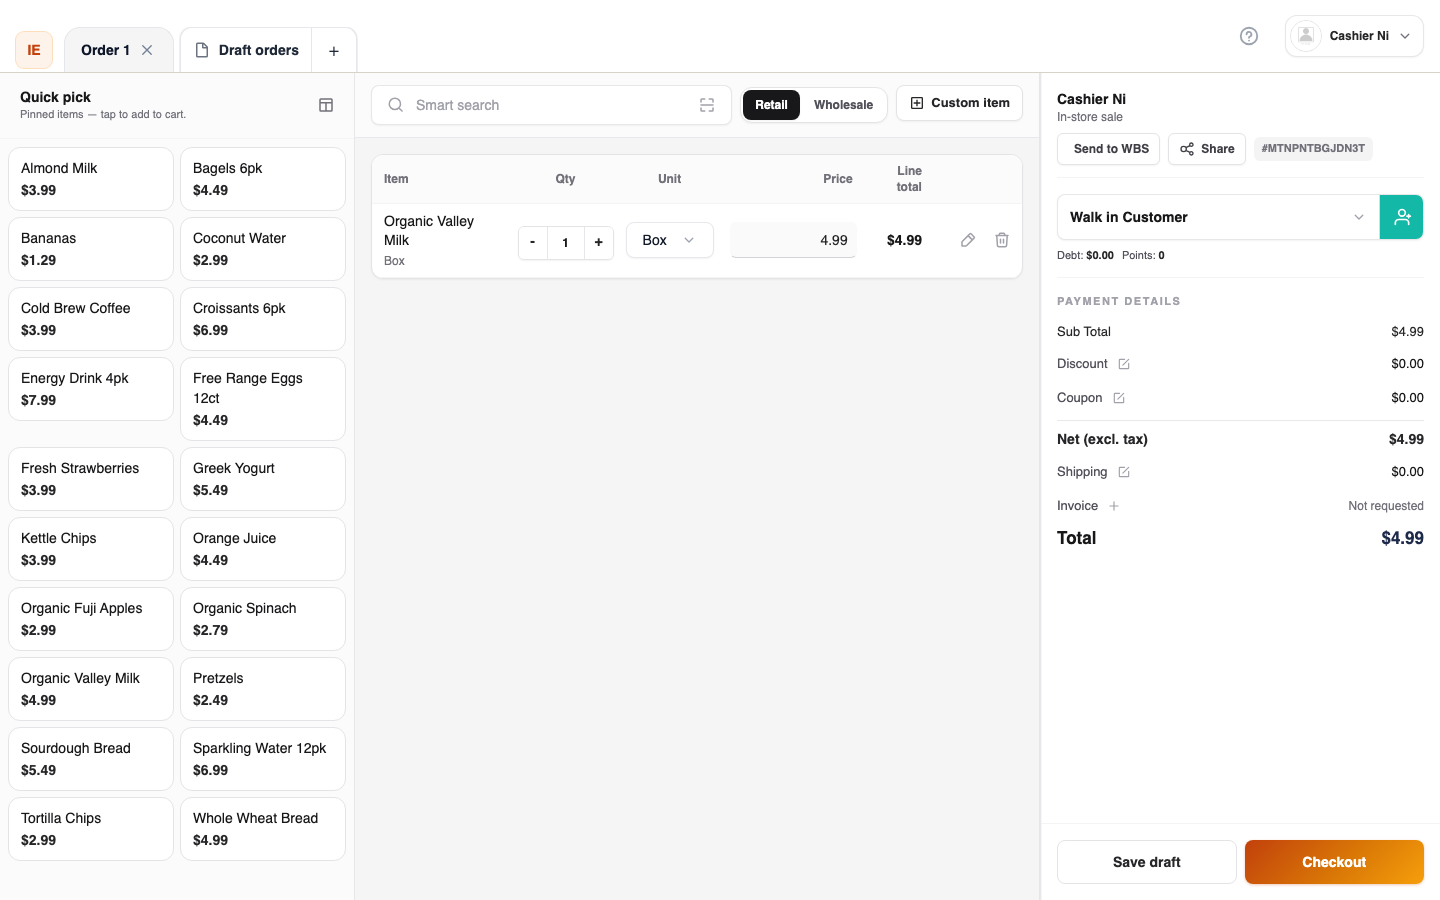 POS workspace — three items in the cart. Checkout is now enabled (green button).
Cart state at this point:
- Line items — name, qty, unit price, line total.
- Subtotal — sum of line totals.
- Discount — optional line-level or order-level discount (toggle inside the cart).
- Tax — auto-computed based on the products’ tax profiles (see Step 4).
- Total — the amount you will collect at checkout.
- Checkout button — switches from disabled → enabled the moment at least one line is in the cart.
6.3 — Quick add (test counter)
Section titled “6.3 — Quick add (test counter)”If you’re testing and don’t have a product yet, click Quick add to add an ad-hoc line that lives only in this sale.
After the sale, choose Save to catalog to promote the ad-hoc line into a real product. Otherwise, the line disappears with the cart.
6.4 — Open the checkout payment modal
Section titled “6.4 — Open the checkout payment modal”Click Checkout. A modal opens over the workspace with the total payable at the top and a row of payment methods as chips below it.
The methods you see depend on the store’s Payments configuration (Settings → General → Payments):
| Method | When it appears |
|---|---|
| Cash | Always (for walk-in / over-the-counter payments). |
| Card | When a PAX / CodePay / Stripe terminal is paired. |
| Wallet | When the customer has a non-zero wallet balance. |
| Other (bank transfer / on-account) | When configured per store. |
The full checkout modal screenshot is captured by the e2e spec under
playwright test e2e/vendor/onboarding/first-store-setup-screenshots.spec.ts. The currentstep-14capture is a best-effort — see the POS Workspace tour reference for the full payment-flow walkthrough including cash-tender, card-tap, and split-tender.
6.5 — Cash payment (easiest path)
Section titled “6.5 — Cash payment (easiest path)”Pick Cash → enter the amount tendered → the system shows the change due → click Confirm.
The order is created. If a printer is paired, the receipt prints automatically.
6.6 — Order detail (verify capture)
Section titled “6.6 — Order detail (verify capture)”Open Sales activity → Orders (/dashboard/orders) and click the order you just placed.
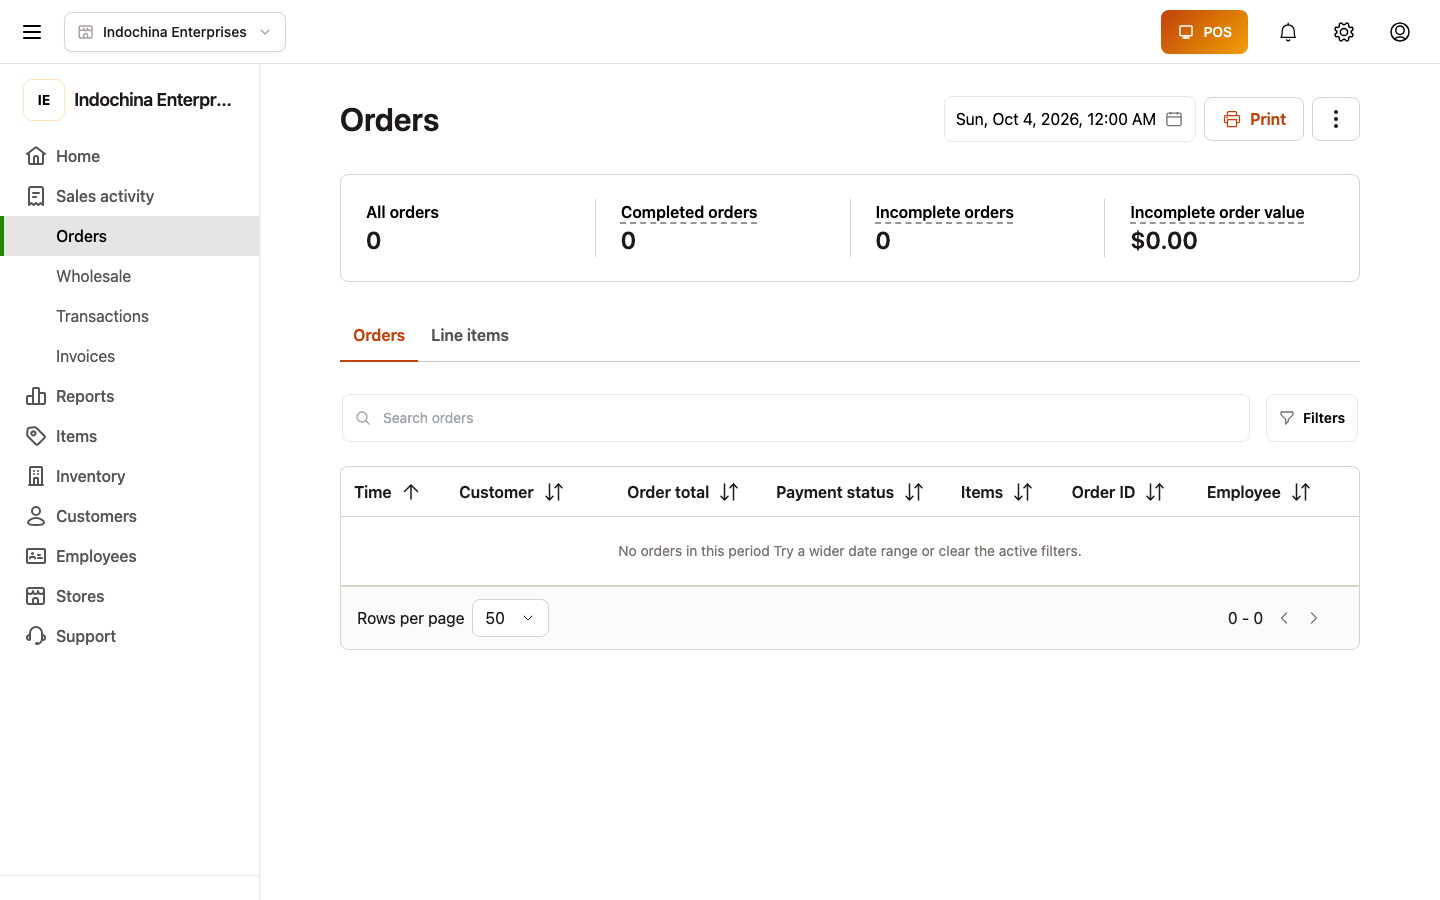
What to verify:
- Line items — correct products, correct qty, correct unit price.
- Subtotal + tax + total match what the cashier saw.
- Payment method = Cash, amount tendered correct, change correct.
- Timeline — “Created by [cashier] at [time]” entry is there.
- Print receipt — re-prints the slip if needed.
If everything checks out, the store is live. If anything fails, the first place to look is the POS Bridge status — a red dot means the WebSocket to the printer is down.
X. Common questions
Section titled “X. Common questions”Do I need to set timezone before adding products? No — but if you add a product today and then change timezone, the stock history stays accurate; calendar reports shift forward (e.g. “Today” rolls over at a different wall-clock time).
Can I import my catalog now? Yes — see Step 1 — Add products for the Excel import flow.
I want a second store later. Open Employees and stores → “Stores” → ”+ New store”. Each store gets its own URL, currency, and timezone.
Where do I configure taxes / VAT? See Finance → Taxes.
The printer test prints but the bridge is red. The bridge and the printer are independent. The bridge is the local relay (Vendor Desktop) — restart it on the desktop machine. The printer test only confirms the network path; the bridge is what carries the order → printer command.
An employee’s “Send invite” email never arrived. Check spam first, then Employees → resend invite. If still nothing, verify the email domain in Settings → SMTP.
XI. Next steps
Section titled “XI. Next steps”After setup, you’re ready to sell. Quick start:
- Step 1 — Add products → Add products
- Step 2 — Stock in (Lots) → Stock in (Lots)
- Step 3 — First sale → Take your first sale
- Step 4 — Returns → Process a return
- Step 5 — Customer debt → Manage customer debt
- Step 6 — Reports → Read your first report
Contact support
Section titled “Contact support”- Support email: support@sutupos.com
- Supported industries: Retail, F&B, Salon / Spa, Hotel, Mini-mart
Related articles
Section titled “Related articles”- Register an account — create a new store on the 14-day free trial.
- Sign in and account — sign in, password recovery, sign out.
- Employees and stores — add staff, assign roles, and issue a temporary password.
- Notifications, help & settings — every settings tab in detail.