Register an account
I. Overview
Section titled “I. Overview”Registering and using LionPOS gives you a complete retail-management solution so you can hit the ground running.
Key benefits of registering a LionPOS account:
- End-to-end store management made simple: LionPOS helps you manage every aspect of your store — products, stock, customers, suppliers, employees, and financial transactions.
- Sell on multiple channels: Run your in-store POS and your online channels (website, social media, marketplaces) from the same back office.
- Get insights in real time: Detailed reports track revenue, profit, and the KPIs you care about so you can react quickly.
II. Basic operations (on a computer)
Section titled “II. Basic operations (on a computer)”You want to create a free trial account directly on the LionPOS website. The flow follows a lean 3-step layout — no email verification is required before creating the store.
- Registration URL:
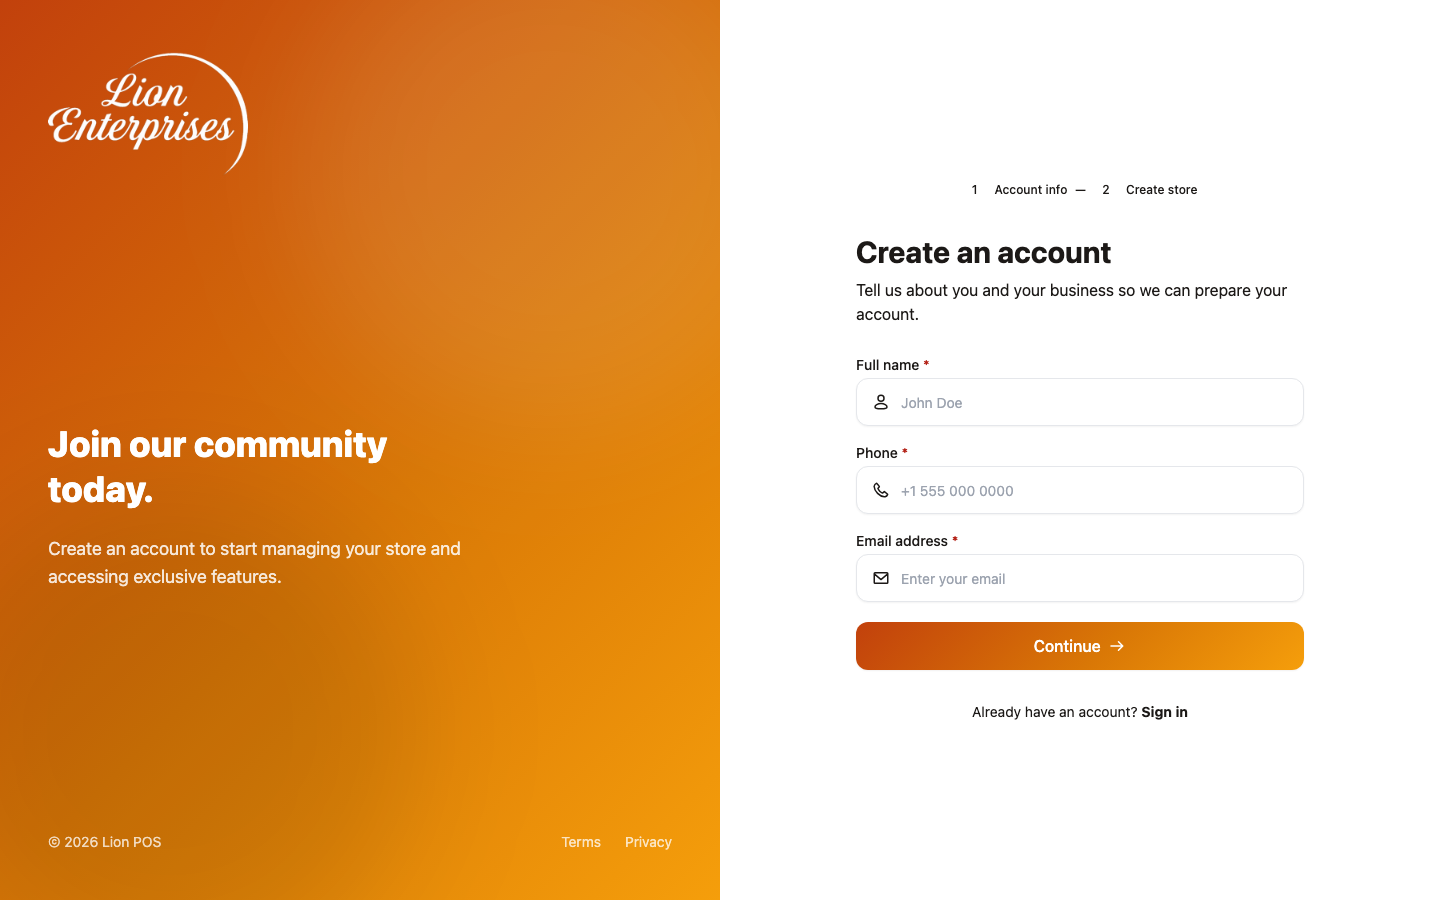
/register - Step 1 — Account info (full name, phone, email)
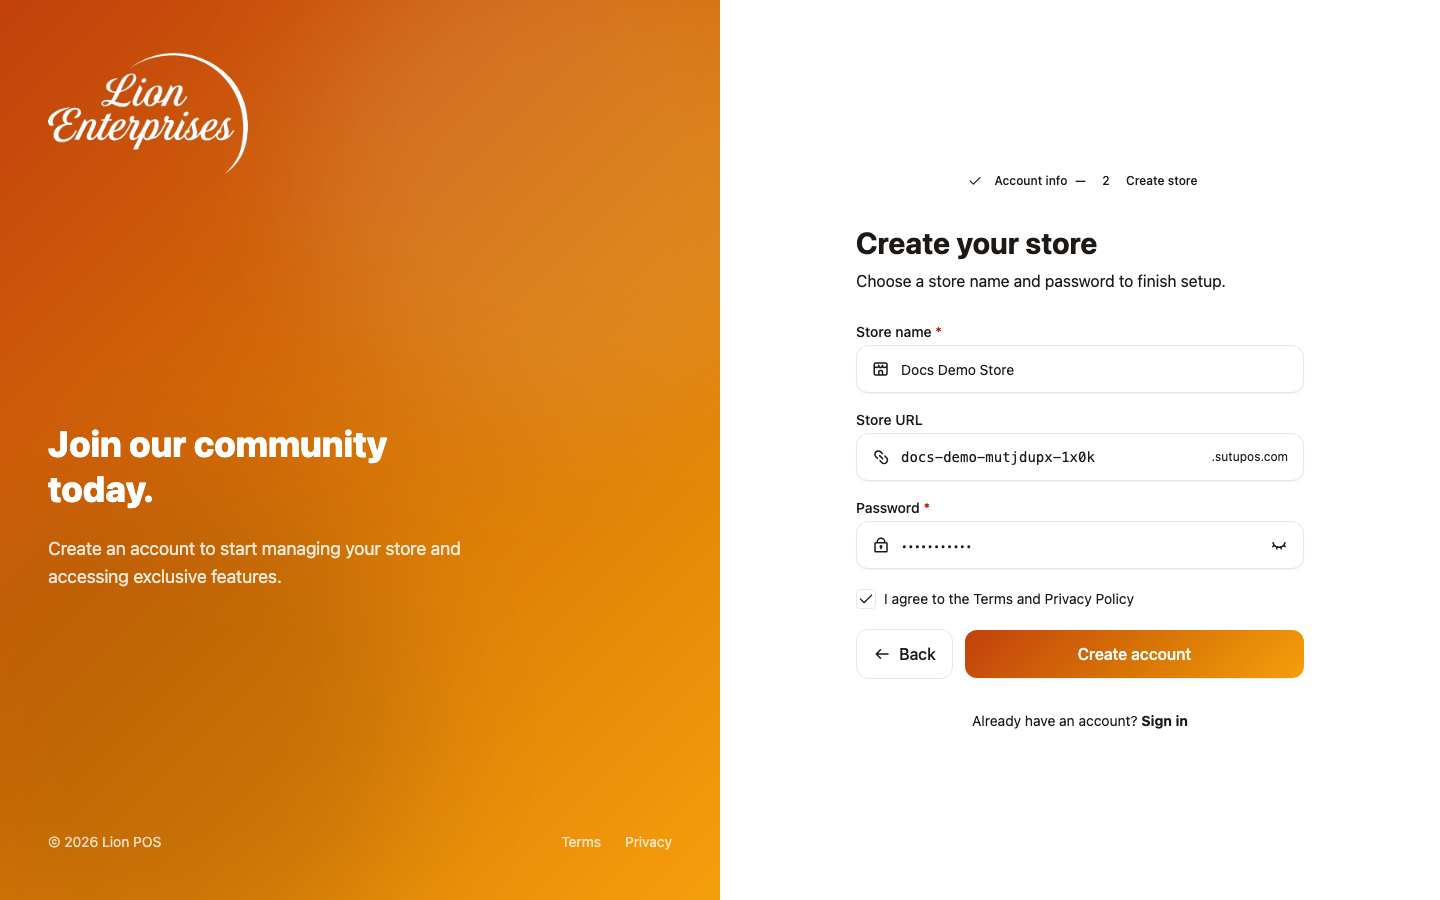
- Step 2 — Create store (store name, store URL slug, password, accept terms)
- Step 3 — Auto-login to the dashboard
Steps:
1. Open the registration page
Section titled “1. Open the registration page”Open a browser and navigate to the official registration page: https://sutupos.com/register
From the home page, you can also click “Start free trial” or “Register” — you’ll be routed to the same page.
2. Fill in account info (Step 1)
Section titled “2. Fill in account info (Step 1)”- Scenario: You need to create a store-owner (Owner) account to start your LionPOS trial.
- Steps:
- On
/register, fill in the three fields:- Full name — Your name as the store owner / responsible person. The form splits it into
f_name+l_namebefore posting to the server. - Phone — Mobile number that will receive the OTP for password recovery (see Sign in and account).
- Email — Sign-in email; also used for order notifications, backups, and password recovery.
- Full name — Your name as the store owner / responsible person. The form splits it into
- The system automatically picks the industry module for the industry you selected on the home page. You don’t need to pick it again here.
- Click “Continue” to move to Step 2. The button only enables once all three fields are valid.
- On
3. Create the store (Step 2)
Section titled “3. Create the store (Step 2)”- Scenario: Your account details are valid and you now need to create your first store.
- Steps:
- Fill in the Step-2 form:
- Store name — Shown on receipts, the access URL, and reports (required).
- Store URL (slug) — Optional. The subdomain of your store:
<slug>.sutupos.com(for example,tiger-store).- Rules: lowercase letters
a-z, digits0-9, and single hyphens only. Must start with a letter, length 3–40, and cannot start or end with a hyphen, or contain two hyphens in a row. - Auto-suggest: leave the field empty and the system generates a slug from your store name (strips Vietnamese diacritics, normalises whitespace). You can edit it manually before clicking “Create account”.
- Slug taken: if the slug you typed is already in use, the server returns a
slug_taken400 error — pick another slug. (If you leave it empty, the server auto-suffixes with-2,-3… to avoid collisions.)
- Rules: lowercase letters
- Password — Minimum 6 characters. Mix upper + lower + digits + symbols for strength.
- Accept terms — Tick “I agree to the Terms and Privacy Policy”. Required.
- Click “Create account” to finish. The button only enables when every field is valid and the terms are accepted.
- Fill in the Step-2 form:
4. Finish registration (Step 3)
Section titled “4. Finish registration (Step 3)”-
Scenario: The system confirmed your details and created the account.
-
Current LionPOS behaviour: After a successful store creation, the system auto-signs you in (issues a JWT) and drops you straight into the store dashboard at
/dashboard— no intermediate welcome screen. This is a deliberate UX choice so that fresh sign-ups can start selling right away. -
Your account is now active with the Owner role and the full Retail module set. You can immediately:
- Add products, customers, and suppliers.
- Open a shift and start selling at the POS.
- Configure extra stores, invite employees, and pair hardware.

III. On a mobile phone
Section titled “III. On a mobile phone”In addition to the web app, LionPOS also supports quick account registration from the LionPOS Mobile app (Expo, iOS + Android).
IV. After registration
Section titled “IV. After registration”Once the account is created, follow these steps to get selling:
- Sign in with the email + password you just created. Your account is now assigned the Owner role with the full module set (you’ve already been auto-signed in after Step 3 above).
- Add your first product — see Step 1 — Products.
- Receive stock — see Step 2 — Stock-in.
- Try a sale — see Step 3 — First sale.
- Invite cashiers — see Employees and stores.
- Configure your first store (timezone, currency, printers…) — see First store setup.
V. Support
Section titled “V. Support”Wishing you a productive business with LionPOS!
Contact support
Section titled “Contact support”- Support email: support@sutupos.com
- Supported industries: Retail, F&B, Salon / Spa, Hotel, Mini-mart
Related articles
Section titled “Related articles”- Sign in and account — sign in, password recovery, sign out.
- First store setup — a 5-minute checklist right after registration.
- Employees and stores — add staff, assign roles, and issue a temporary password.
- Roles — which module lets you do what.