Settings — Terminal payment
import { Aside } from ‘@astrojs/starlight/components’;
When to use this page
Section titled “When to use this page”A cashier needs to swipe a card for a customer at the lane. This guide is for the store owner / device administrator (not for the cashier ringing sales).
Once configured, the cashier opens the Sale screen → picks the Card tender → the system calls the terminal via the Vendor Desktop bridge → customer taps/swipes → result returns to the UI.
Source: apps/vendor-web/src/app/point-of-sale/pages/settings/settings-hardware-terminal-page.tsx + <DeviceSettings hardwareFocus="terminals" />.
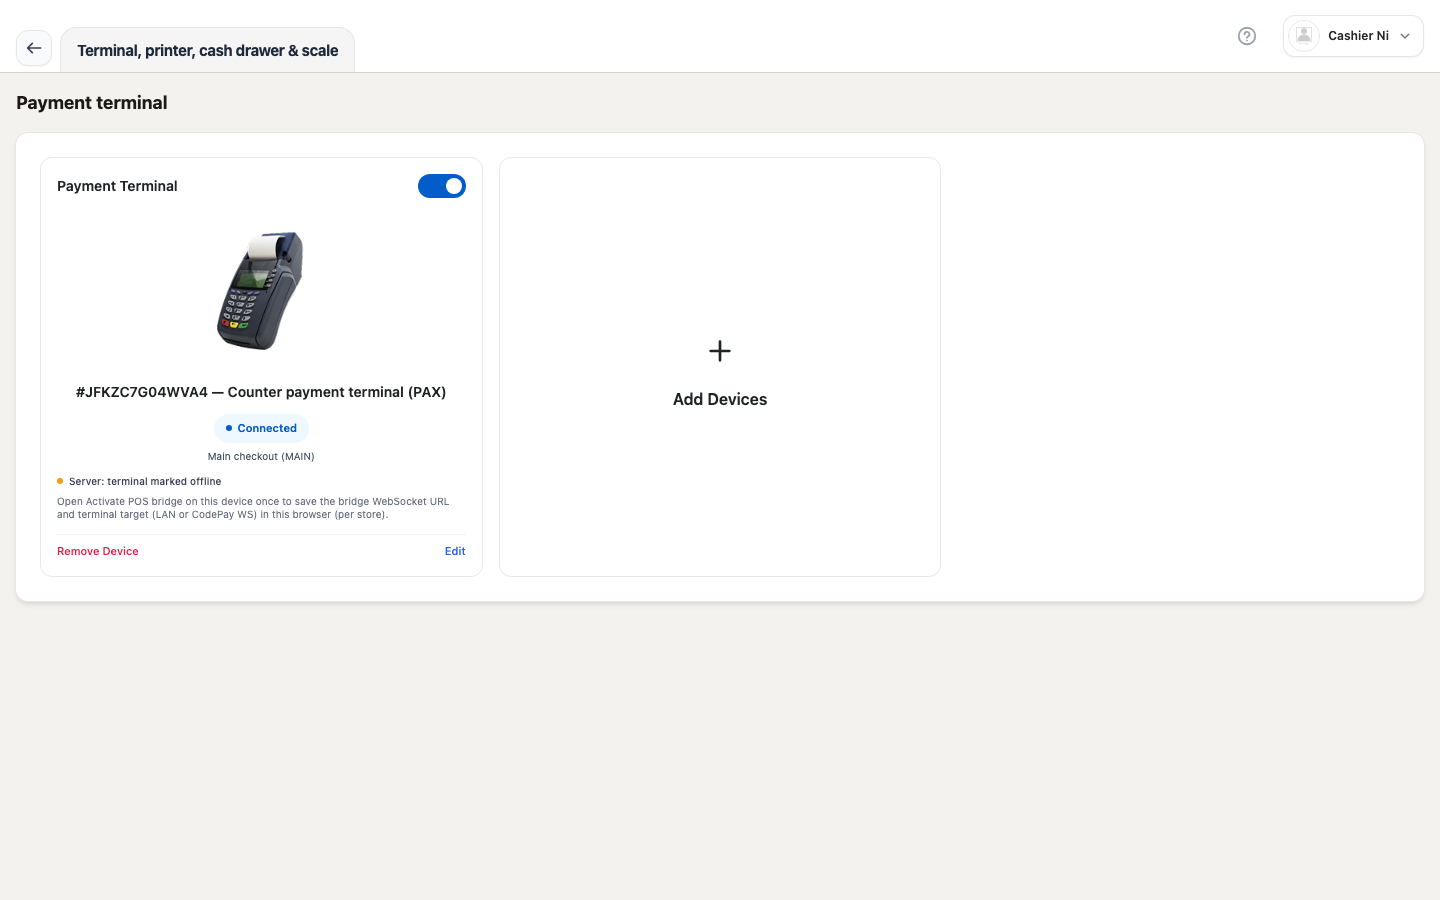 Image: terminal config — PAX LAN / CodePay WS device list, “Local ECE ready” badge, bridge activate button. Spec owner:
 cashier-screenshots.spec.ts → "settings — terminal payment".
Before you start
Section titled “Before you start”- Vendor Desktop must be running on the lane PC — the terminal talks to the bridge that lives in this app.
- Cashiers only need
poswrite to ring sales; device configuration needssettingswrite (owner only). - You need the IP + port of the PAX terminal, or the WebSocket URL of the CodePay device.
4 configuration steps
Section titled “4 configuration steps”Step 1 — Open the terminal page
Section titled “Step 1 — Open the terminal page”From the Cashier shell → Settings → Terminal (/point-of-sale/settings/terminal).
If the cashier can’t see this entry, the owner needs to grant settings write (see FAQ — access & roles).
Step 2 — Add a device
Section titled “Step 2 — Add a device”Click + Add device → choose Payment terminal.
The form requires:
| Field | Description |
|---|---|
| Name | Display name (e.g. “PAX Lane 1”) |
| Manufacturer | PAX (LAN) or CODEPAY (WebSocket) |
| Connect method | LAN / TCP for PAX, WEBSOCKET for CodePay |
| IP | Terminal IP on the LAN |
| Port | TCP port (PAX default: 10009) |
| WebSocket URL | wss://... URL for CodePay |
Source: apps/vendor-web/src/components/dashboard/settings/device-settings-form.schema.ts.
Step 3 — Enable the device
Section titled “Step 3 — Enable the device”On the device card, flip the Enable/Disable toggle to green (getDeviceActive(device)). Disabled devices are never called during sales.
Step 4 — Activate the bridge
Section titled “Step 4 — Activate the bridge”After saving, the card shows one of two states:
The helper canOpenPosBridgeActivate requires IP + port (LAN) or a valid wss:// URL (CodePay).
Two device kinds
Section titled “Two device kinds”| Kind | Manufacturer | Method | Prefer when |
|---|---|---|---|
| PAX LAN | PAX | TCP | Terminal is on the same network as the lane PC, stable, no internet dependency |
| CodePay WS | CODEPAY | WEBSOCKET | Terminal is remote (other branch) or uses a cloud gateway |
isCodepayWsCard is detected when manufacturer is CODEPAY, method is WEBSOCKET, and terminalWsUrl matches ^wss?://.
Expected outcome
Section titled “Expected outcome”- On the Sale screen → pick Card → terminal popup receives the order from the bridge.
- After the customer taps/swipes, the result (success / failure) returns in a few seconds.
- The final result creates one transaction in the order — cashier must not click anything else to avoid double charges.
Common issues
Section titled “Common issues”| Symptom | Fix |
|---|---|
| Device card greyed out, toggle doesn’t respond | Missing IP/port or CodePay URL — check the form |
bridgeActivate failed toast | Vendor Desktop isn’t running, or the bridge hasn’t connected to the server |
| Card ring hangs on spinner | See FAQ — print & hardware → Card payment stuck |
CodePay URL doesn’t match wss?:// | The helper won’t treat it as CodePay WS — check the URL scheme |
Related technical pieces
Section titled “Related technical pieces”- Component:
<DeviceSettings hardwareFocus="terminals">(apps/vendor-web/src/components/dashboard/settings/DeviceSettings.tsx) - API:
fetchVendorDevicesSettings,patchVendorDevicesSettings(apps/vendor-web/src/services/vendor-settings.api.ts) - Bridge:
postVendorPosBridgeActivateFromDevice+DevicePosBridgePersistedPanel