Step 1 — Add products
I. Goal
Section titled “I. Goal”By the end of Step 1 you can:
- See your products in the POS catalog before the end of the day — a cashier at the counter can scan a barcode or pick from the product grid and get the right price + stock + tax displayed.
- Open the full edit page for any product and confidently navigate every accordion section: Details, Taxes and fees, Categories, Item variants, Stores & inventory, Promotions, Other settings.
- Explain the difference between retail price and wholesale price and which channel each one applies to.
- Create variants (Size, Color, …) from a master attribute and understand the variant matrix that the system generates automatically.
If you only have time to read one section, jump to Section VI — The full edit page. That section is the heart of Step 1; everything else is either the entry point into that page or a sub-area that supports it.
II. Three ways to add a product
Section titled “II. Three ways to add a product”| Way | When to use | Time | Persists to catalog? |
|---|---|---|---|
| Quick add from POS | You’re testing the counter — one or two products only. | 30 s | No (lives on the order) |
| Add item details modal (Clover-style, on the Items list page) | You sell ~30 SKUs and want control over each. | 1–2 min | Yes (creates the catalog row) |
| Excel import | You already have a master list or current catalog. | 5–15 min | Yes (bulk) |
Read more: Catalog & products — the main reference for the entire Items area.
The rest of this guide focuses on the Add item details modal + the full edit page that follows, because that is the path that gives you access to every catalog capability. The other two paths are convenience shortcuts for high-volume or counter-only flows.
III. Items list — your catalog home base
Section titled “III. Items list — your catalog home base”Before you create anything, locate the catalog home base. From the left sidebar open Items → Item list — the route is VENDOR_ROUTES.items.list (/dashboard/items/list).
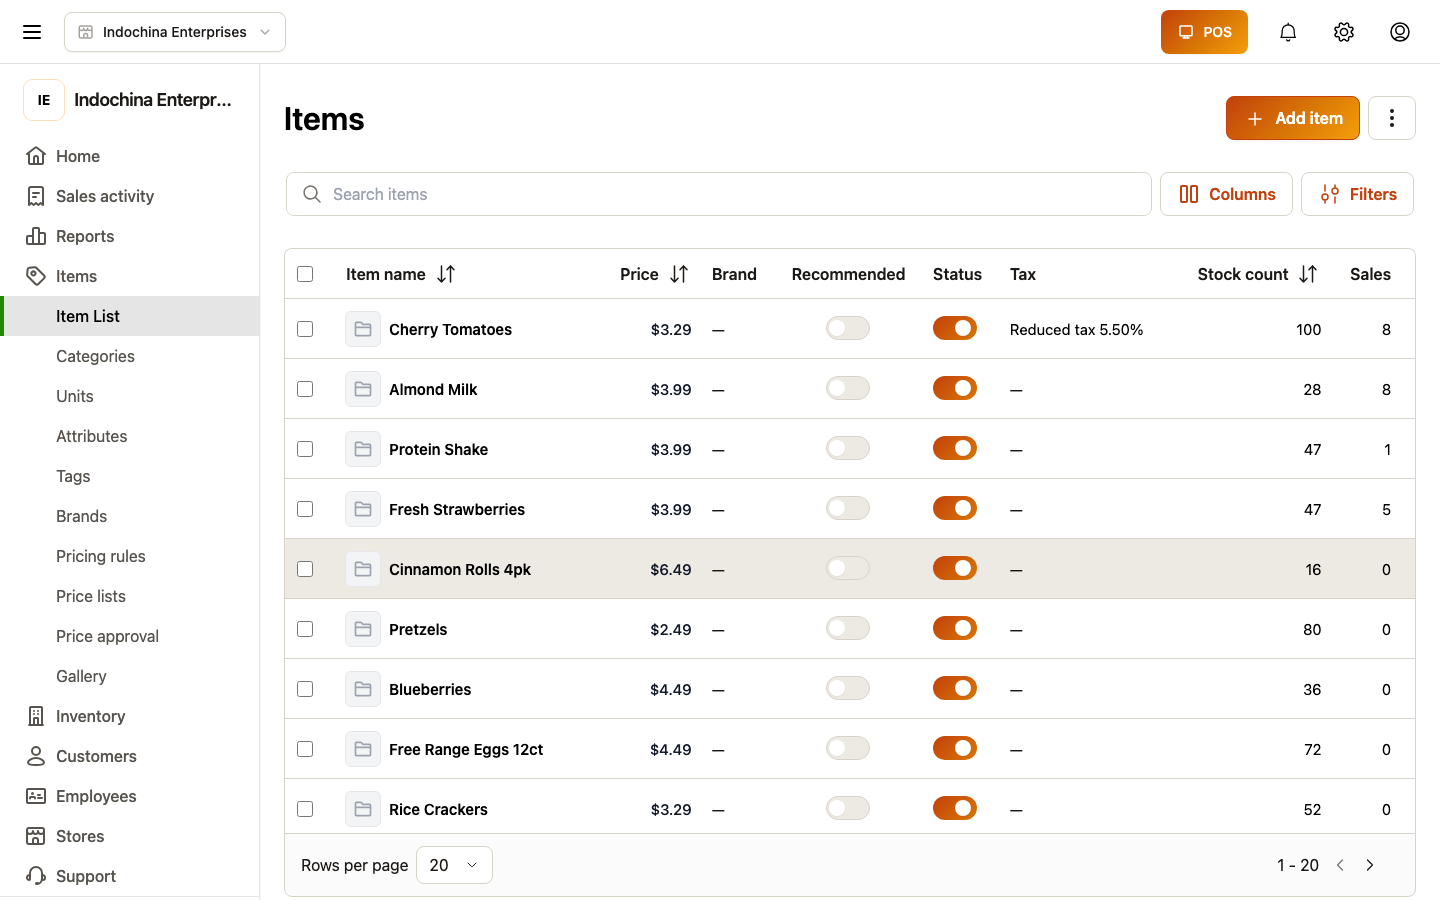 The items list — the main dashboard for the entire catalog. The ”+ Add item” button lives in the top-right of the page header (green primary button, + icon), right next to the overflow menu (Export / Import / Print). The filter row above the table holds search, Columns, Filters, and the + Add item trigger. Status filtering (Active / Draft / Archived / In stock / Low stock / Out of stock) is in the Filters drawer.
What you can do from this page without entering the edit form:
- Filter by status, category, brand, stock status, and price range (drawer).
- Search by name, SKU, or barcode (debounced).
- Bulk select rows (max 200 per batch — see Dashboard table pagination rule) and batch delete or batch change status from the selection toolbar.
- Export to Excel (overflow menu) — downloads a dated XLSX of the current filter set.
- Import Excel (overflow menu) — see Section XV.
- Open the edit page by clicking a row (detail) and then the Edit button, or directly via the row’s overflow menu.
IV. Quick add from POS (counter test)
Section titled “IV. Quick add from POS (counter test)”This is a counter-only flow — the product is created on the fly for a single sale and is not saved to the master catalog unless you press Save to catalog at the end.
In POS Workspace (route VENDOR_ROUTES.pointOfSale.sale, /point-of-sale/sale), click Quick add (or the + next to the cart) and fill in:
| Field | Required? | Example |
|---|---|---|
| Name | Yes | “Test product” |
| Price | Yes | 10000 |
| Unit | Yes | each / kg / pack |
| (optional) Category | No | unclassified |
| (optional) Barcode | No | SKU-001 |
The product only exists for that sale. It is not added to the catalog unless you press Save to catalog at the end of the order.
Use this when you are stress-testing the counter before the real product master is ready. It is also a fast way to test what an unknown barcode would do at checkout.
V. Add item details modal — the Clover-style fast create
Section titled “V. Add item details modal — the Clover-style fast create”Click + Add item in the top-right of the Items list header. The system opens the “Add item details” modal (AddItemDetailsModal) — a full-screen Clover-style dialog. It collects the minimum data needed to create a product, then navigates you straight into the full edit page so you can keep filling in the rest.
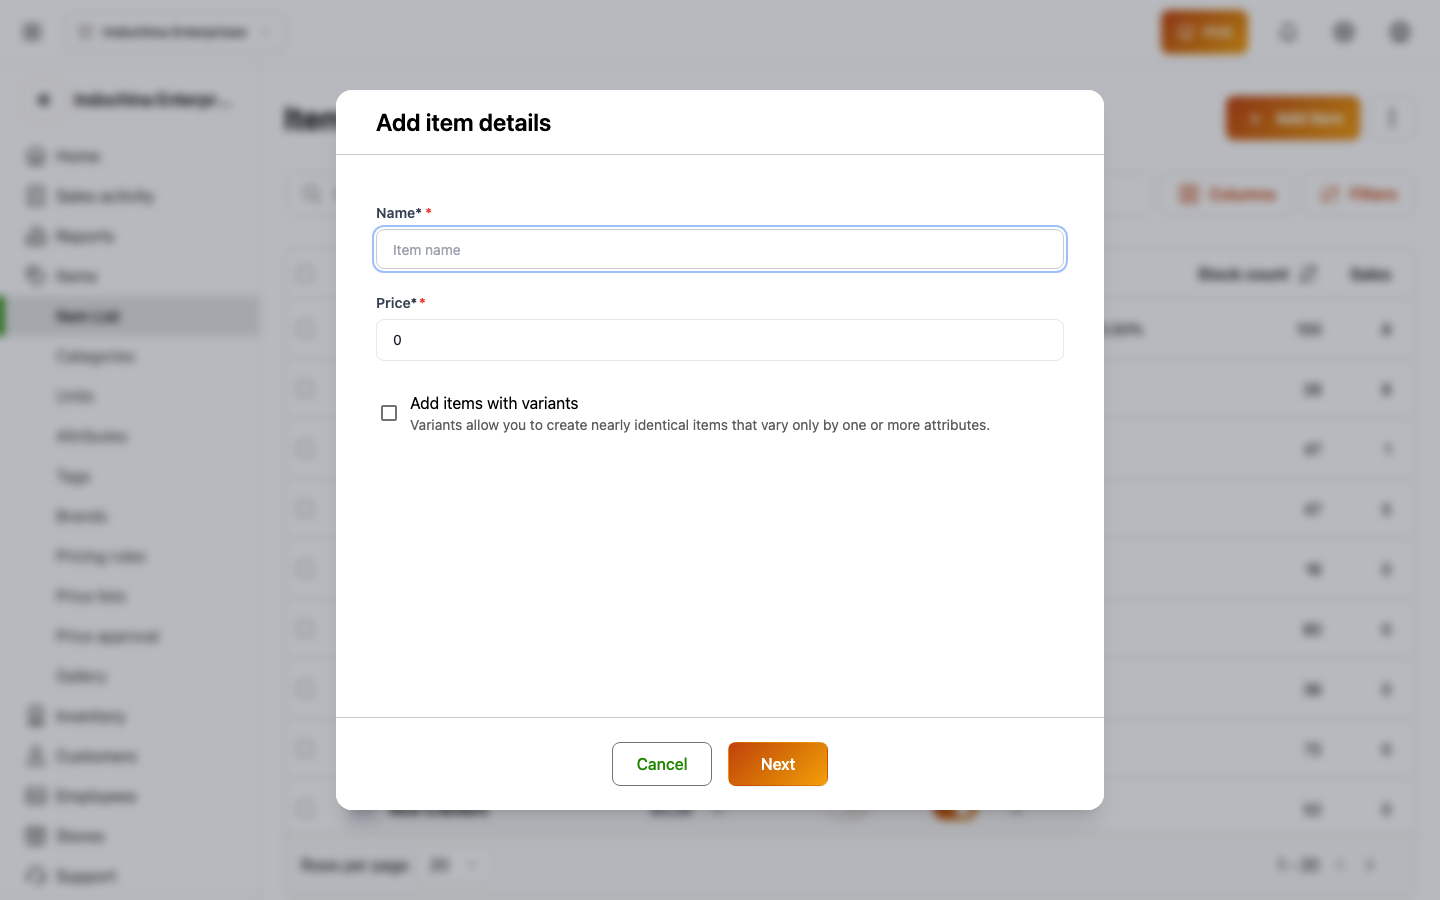 The “Add item details” modal — required fields are Name and Price. Toggle “Add items with variants” to seed up to N variant axes from a master attribute. Click “Next” to create the product and open the full edit page.
V.1 What the modal asks for
Section titled “V.1 What the modal asks for”| Field | Type | Required | Notes |
|---|---|---|---|
| Name | text | Yes | 1–127 characters. This becomes the product’s display name at the counter and on the online menu. |
| Price | number | Yes | Positive decimal. Maps to the retail price column. The Wholesale price is not set here — set it later in the edit page. |
| Add items with variants | checkbox | No | When checked, the modal reveals a per-row picker (master attribute + tag-style values editor). |
| (per row) Select attribute | dropdown | Required when variants are enabled | Lists all master attributes defined in Settings → Attributes. Already-picked attributes are filtered out of sibling rows so each row maps to a unique axis. |
| (per row) Option values | tag input | Required when variants are enabled | Pre-fills from the attribute’s preset values (Size → Small / Medium / Large). Press Enter to add a free-text tag. |
Important: the modal does not let you set unit, category, taxes, supplier, or stock at this stage. The first release is intentionally tiny — it gets you into the full edit page as quickly as possible. Everything else (taxes, variants matrix, stores, etc.) is filled out on the full edit page after the row exists.
V.2 Adding variants during fast create
Section titled “V.2 Adding variants during fast create”Enabling “Add items with variants” auto-seeds the first row with the first master attribute and its preset values. To add a second axis (e.g. Size + Color):
- Click + Add another — a new row appears with an empty attribute select.
- Pick the second attribute. The picker excludes any attribute already used by another row.
- Either accept the preset values or type new ones in the tag input (press Enter to commit each tag).
The matrix is not materialised on this screen — the modal only records the axes (attributes + choice_options). The full variant rows (one per option combination) are generated by the edit page when you save — see Section X.6.
If you do not have any master attributes yet, the modal shows a “No attributes yet” empty state with a Create attribute button that opens the Attribute modal without leaving the flow.
V.3 After Next — what happens
Section titled “V.3 After Next — what happens”Clicking Next runs createVendorProduct({ name, price, attributes, choice_options }):
- The product is persisted with
status = 1(active) andtype = RETAILby default. - The list cache is invalidated so the new row shows up.
- The router navigates to
vendorCatalogItemEditPath(created.id)— i.e./dashboard/items/:id/edit— the full edit page. - A success toast confirms the creation.
From here on, you are on the full edit page, and the next sections walk you through every accordion.
VI. The full edit page (the heart of Step 1)
Section titled “VI. The full edit page (the heart of Step 1)”The full edit page is rendered by apps/vendor-web/src/app/dashboard/items/product-form-page.tsx and is mounted at /dashboard/items/:id/edit (helper: vendorCatalogItemEditPath(id)).
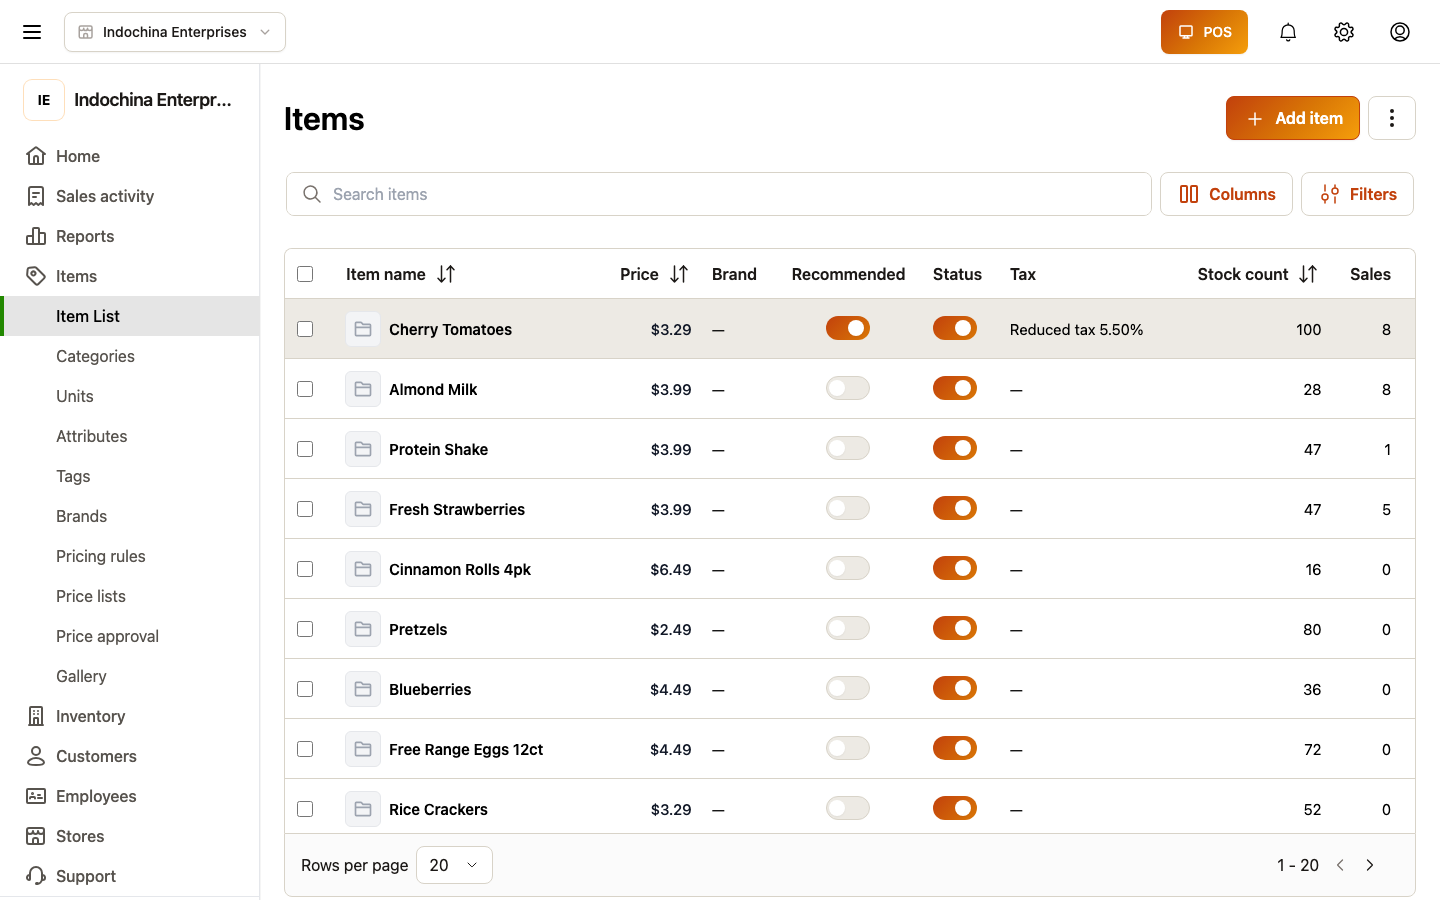 The full edit page — the catalog workhorse. It is one long form split into accordion sections. By default every section is open, so the whole card hierarchy scrolls into view. The sticky footer holds Cancel and Save changes; the page header holds a back button, breadcrumb, Duplicate, and an overflow menu with Delete.
VI.1 Anatomy of the page
Section titled “VI.1 Anatomy of the page”From top to bottom:
- Page header — back button to the items list, the product name (live bound to the form), and an overflow menu with Duplicate and Delete. Delete opens
DeleteProductModal; Duplicate opensDuplicateProductModalwhich clones the row with" (copy)"suffixed to the name and re-mints SKU/barcode where applicable. - Status banner (only when the product is archived) — a yellow callout that the item is hidden from the counter and from the online menu. You can restore it from the Status toggle in the Details section.
- Accordion sections (in order):
- Details — open by default
- Taxes and fees — open by default
- Categories — open by default
- Item variants — open by default
- Stores & inventory — open by default
- Promotions & discounts — open by default
- Other settings — open by default (contains conversion units + suppliers)
- Sticky footer — Cancel (returns to the detail or list page) and Save changes (
Buttonwithtype="submit"). The footer isborder-ton the body so it always sits below the last accordion.
Each section is rendered by a dedicated component under apps/vendor-web/src/components/dashboard/products/, all wired into the same React Hook Form context. That means a field you change in one section is immediately visible in another (e.g. a new variant in the Item variants section is reflected in the Stores & inventory matrix the next time you scroll down).
VI.2 Sticky save bar & status banner
Section titled “VI.2 Sticky save bar & status banner”- The save button is the only place that actually calls the API (
updateVendorProduct). Every accordion is a local edit until you press save. - Cancel returns to the detail page if the product exists (
vendorCatalogItemDetailPath(id)) or to the items list if you opened the page from “create” without saving. - A validation error summary appears above the save button when at least one Zod check fails — the offending fields also highlight in red.
- The page is wired to the shared
useForm+zodResolverschema (product-form.schema.ts); required fields are marked with a red*in the label.
VII. Section: Details
Section titled “VII. Section: Details”The first accordion. It mirrors the Clover item.html field order and is implemented by ProductFormDetailsSection.
 The Details accordion — Pin on POS, Name, Alternative name, Price, Price type, Wholesale, Cost, Unit, then the Online ordering block (image + description).
VII.1 On device block — Pin on POS
Section titled “VII.1 On device block — Pin on POS”| Field | What it does |
|---|---|
Pin on POS toggle (is_pos_pinned) | When on, the product is treated as a “featured” SKU and is prioritised on the cashier’s quick-pick row in the POS workspace. When off, the product still appears in the catalog but not on the featured row. |
“Show on POS” was renamed to Pin on POS in a recent refactor — they map to the same
is_pos_pinnedbackend column.
VII.2 Name, Alternative name
Section titled “VII.2 Name, Alternative name”| Field | Required | Notes |
|---|---|---|
| Name | Yes | The display name on the receipt, the POS grid, and the online menu. Up to 127 characters. |
| Alternative name | No | Fallback display used in some receipts and reports when the primary name is missing or too long to fit. Does not affect search or filtering. |
VII.3 Price & Price type — Fixed / Variable / Per unit
Section titled “VII.3 Price & Price type — Fixed / Variable / Per unit”| Field | Required | Notes |
|---|---|---|
Price (price) | Yes | Retail price in the store’s currency. Display uses the store currency symbol from VENDOR_CATALOG_CURRENCY_CODE. |
Price type (price_type) | No | One of Fixed (default), Variable, Per unit. |
Behaviour per price type:
- Fixed — the cashier sees a single price; tapping the line on the POS grid adds the item at that price. Used for >95% of products.
- Variable — the cashier is prompted to enter a price at checkout (donations, custom services). The Price field becomes a suggested price.
- Per unit — the cashier is prompted to enter a quantity at checkout (weighed produce, fabric cut to length). The Unit field becomes required at the form level — see Section VII.6.
VII.4 Wholesale price
Section titled “VII.4 Wholesale price”A separate field that lives next to Price. The wholesale price is only applied when the product is sold through the Wholesale channel — i.e. orders.type = WHOLESALE. In the Retail channel (default POS and online menu), the regular price is used.
The product can be sold in both channels without duplicating rows. The form’s “Catalog types” field controls this — see Section XIV.
If you only sell retail, leave Wholesale empty. If you sell wholesale and want a different price list per channel, the system also supports per-channel Price lists at /dashboard/items/price-lists (more advanced — outside the scope of Step 1).
VII.5 Cost & Non-revenue item
Section titled “VII.5 Cost & Non-revenue item”| Field | Required | Notes |
|---|---|---|
Cost (cost) | No | The cost-of-goods-sold (COGS) figure used for gross profit margin in finance reports. |
| Non-revenue item toggle | No | When on, the product is excluded from revenue totals in reports (e.g. a free sample given with every order, or a container deposit). |
RBAC: the cost field is gated by
vendorCanViewProductCost. If your role does not have the cost-view permission, the entire Cost block is hidden, and the Taxes and fees section shows a “Tax fields respect your cost-view permission” hint.
VII.6 Unit
Section titled “VII.6 Unit”| Field | Required | Notes |
|---|---|---|
Unit (item_unit_id) | Required when price_type = Per unit, otherwise optional | Maps to the master units table. Use it for kg, m, hour, pack, etc. The unit select shows the units defined under VENDOR_ROUTES.items.units. |
A small + button next to the unit field opens the Unit modal so you can define a new unit without leaving the form.
VII.7 Online ordering block — image & description
Section titled “VII.7 Online ordering block — image & description”The bottom half of the Details accordion is the Online ordering block, mirroring the Clover layout.
| Field | Required | Notes |
|---|---|---|
| Item image | No | Cover image. Picked from the vendor media gallery (VendorGalleryImagePickerModal); supports a single cover and a multi-image album. |
| Description | No | Rich-text editor (ProductFormRichTextEditor) — supports formatting, links, and lists. Sanitised through sanitizeRichHtml before save. Displayed on the online menu and on receipts (configurable). |
Removed per recent refactor (so this guide matches the current UI): Item color, Age-restricted, and Online name. Their columns may still exist in the database for backward compatibility, but they are no longer rendered.
VIII. Section: Taxes and fees
Section titled “VIII. Section: Taxes and fees”Implemented by ProductFormTaxesAndFeesSection. One accordion, three concepts.
 The Taxes and fees accordion. Empty state on the left; a configured product on the right with a custom inline tax and a link to store tax settings. The “Tax exempt” toggle is the first row.
VIII.1 How checkout tax is computed
Section titled “VIII.1 How checkout tax is computed”The data model supports two independent tax inputs on every product:
- A store tax profile (
store_tax_id) — a reusable tax rule defined under Settings → Taxes and fees. The store tax knows its own rate and type. See Section XVI for where to manage these. - An inline custom tax (
tax_type+tax_value) — a per-item override used when the product needs a special rate that does not belong in the global store tax table.
At checkout, the engine resolves the effective tax for the product as follows:
- If
is_tax_exempt = true→ no tax is applied (and the section renders a “Tax exempt — no tax applied” note). - Else if
store_tax_idis set → that profile’s rate is used. - Else if
tax_value > 0→ the inlinetax_value(withtax_type=percentoramount) is used. - Else → no tax is applied.
The accordion always shows what will actually be applied. That’s why the body is a tiny table — not a settings panel.
VIII.2 Assigning a store tax profile
Section titled “VIII.2 Assigning a store tax profile”Click Assign taxes and fees to open AssignTaxesAndFeesDrawer:
- The drawer lists every store tax defined under
VENDOR_ROUTES.items.taxes(/dashboard/items/taxes). - Selecting a profile writes
store_tax_idto the form; the inline custom tax fields are not cleared, but the resolved row is the profile. - A “Go to Settings” link inside the drawer jumps to the store tax manager so you can create a new profile if the one you need does not exist.
VIII.3 Custom inline tax
Section titled “VIII.3 Custom inline tax”Use this when you need a one-off tax for a single product. The drawer exposes:
- Tax type —
Percent(e.g. 5 = 5%) orFixed amount(e.g. 1000 = 1000₫ flat). - Tax value — the number. Validation rejects negative numbers.
- Add — writes the inline tax to the form; the table now shows the custom row.
Anti-pattern: use the store tax profile for anything that affects more than one product. The inline field is intentionally limited to one tax per product — there is no “stack” of inline taxes.
VIII.4 Tax exempt
Section titled “VIII.4 Tax exempt”A single Tax exempt toggle in the body. When on:
- The resolved tax row in the table is replaced by the “Tax exempt” note.
- The store tax and inline custom tax fields are not cleared (they re-apply if you toggle exempt off).
IX. Section: Categories
Section titled “IX. Section: Categories”Implemented by ProductFormCategoriesSection. Mirrors the same pattern as the other assignment accordions (Taxes, Modifier groups, Stores).
 The Categories accordion. Each assigned category has a position number (#1 is the primary category).
IX.1 Why categories matter
Section titled “IX.1 Why categories matter”Categories are used for three things in the rest of the system:
- POS filter — the cashier can narrow the product grid by category.
- Online menu grouping — the menu page groups products by primary category.
- Sales reports — revenue and units sold are rolled up by category in the Sales Report.
IX.2 Primary category rule
Section titled “IX.2 Primary category rule”The first category in the list is the primary category. It is the one shown in POS filters, used in the online menu grouping, and reported on in the Sales Report category breakdown.
The list preserves the order you select. To reorder, remove and re-select in the desired order — or use the Edit action in the selection toolbar.
Categories are managed under VENDOR_ROUTES.items.categories (/dashboard/items/categories).
X. Section: Item variants — the deep dive
Section titled “X. Section: Item variants — the deep dive”This is the most important accordion for any store that sells “the same product in different sizes / colours / capacities” — e.g. a t-shirt in S/M/L/XL, a beverage in 330 ml / 500 ml / 1 L. It is implemented by ProductFormItemVariantsSection and is the most complex section in the form.
 The Item variants accordion — Attributes subsection (top) and Variants subsection (bottom). The empty state shown is what you get on a brand-new product with no attributes yet.
X.1 Attributes vs Variants — the mental model
Section titled “X.1 Attributes vs Variants — the mental model”This is the concept that catches new users the most often, so it is worth a clear diagram.
Master attribute         →  "Size" (id: ATTR_SIZE)   Preset values           →  ["Small", "Medium", "Large"]
Choice options on item  →  choice_options: [                              { id: ATTR_SIZE, name: "Size",                                values: ["Small", "Medium", "Large"] }                            ]
Generated variant matrix →  3 rows:                              - Small                              - Medium                              - Large
If you add a second attribute — e.g. Color with ["Red", "Blue"] — the matrix becomes the cartesian product: 3 × 2 = 6 variants (Small/Red, Small/Blue, Medium/Red, …). Every combination is its own sellable row with its own SKU, barcode, price, and stock.
X.2 Attributes subsection
Section titled “X.2 Attributes subsection”The top half of the accordion. Lists the attributes currently bound to this product.
| Column | Meaning |
|---|---|
| Attribute | Human-readable name (e.g. “Size”). Falls back to the attribute id if the lookup has not yet hydrated. |
| Options | Comma-separated list of values that are active for this item. Click Edit in the row to open the inline option editor (add/remove values; changes feed into choice_options). |
Toolbar actions:
- + Add attribute (top right, green) — opens
AssignAttributesDrawer. The drawer lists every master attribute defined underVENDOR_ROUTES.items.attributesand lets you multi-select. - Edit (selection toolbar) — re-opens the drawer in “edit” mode so you can add/remove attributes.
- Remove (selection toolbar) — drops the selected attributes. Dropping an attribute regenerates the variant matrix — see Section X.6.
X.3 Variants subsection
Section titled “X.3 Variants subsection”The bottom half of the accordion. Lists the materialised variant rows (one per combination of the active attributes’ values).
| Column | Editable in cell? | Notes |
|---|---|---|
| Name | Yes (drawer) | Display name; defaults to the combination of the option values (e.g. “Red / Large”). |
| Barcode | Yes (drawer) | Scannable barcode. Leave blank to auto-generate EAN-13 on save. |
| Cost | Yes (drawer) | Per-variant COGS. Falls back to the product-level cost if blank. |
| Price | Yes (drawer) | Per-variant retail price. Falls back to the product-level price if blank. |
| Wholesale | Yes (drawer) | Per-variant wholesale price. Falls back to the product-level wholesale price if blank. |
| In stock | Yes (drawer) | The on-hand count for this variant at the default warehouse. See Section XI.3 for how this interacts with the per-warehouse matrix. |
Search (“Search items”) and pagination (25 / 50 / 100 per page) live above the table.
X.4 Edit variant drawer — what every cell means
Section titled “X.4 Edit variant drawer — what every cell means”Click any variant row (or select rows + Edit) to open EditVariantDrawer. The drawer exposes every per-variant field that overrides the product-level defaults:
| Field | Maps to | Notes |
|---|---|---|
| Variant name | variation.name | Defaults to the option combination. Editable. |
| SKU | variation.sku | Stock-keeping unit. Used for inventory and supplier catalogs. |
| PLU | variation.plu | Price-look-up code (used by some scales and POS peripherals). |
| Barcode | variation.barcode | Scannable. Use Random to auto-generate an EAN-13 (passes the Luhn checksum). |
| Cost | variation.cost | Per-variant COGS. |
| Price | variation.price | Per-variant retail price. |
| Wholesale | variation.wholesale_price | Per-variant wholesale price. |
| Stock | variation.stock | Quick-edit for the default warehouse only. |
| Low stock threshold | variation.low_stock_threshold | Per-variant override. Falls back to the product-level value. |
| Maximum cart quantity | variation.max_cart_qty | Per-variant cap. Falls back to the product-level value. |
| Available | variation.is_available | When off, the variant is hidden from POS and online without disabling the parent item. |
Click Save in the drawer to write the per-variant overrides. The variant row in the accordion reflects the new values immediately.
X.5 Delete variants
Section titled “X.5 Delete variants”- Per row — the trash icon in the row opens
DeleteVariantConfirmModal. - Batch — select multiple rows + Delete in the selection toolbar. The batch modal asks “Delete {{count}} variants?”.
Deleting a variant is destructive — it removes the variant’s SKU, barcode, per-warehouse stock, and any history. Use the Available = off toggle in the drawer for “soft delete” if you might need the variant back.
X.6 How the variant matrix is generated
Section titled “X.6 How the variant matrix is generated”The matrix is derived from attributes + choice_options on the product. The generation happens at three moments:
- On save (server side) — the backend expands the cross product of every active attribute’s values into
variations. Variant rows that were previously persisted but no longer appear in the matrix (because an attribute was removed or a value was deleted) are dropped; new combinations are inserted with the per-variant fields left null (so they inherit from the product). - On attribute add/remove in the editor — when you click Add attribute or Remove in the attribute toolbar, the form calls a helper that recomputes
variationslocally so the Variants table updates before you save. This is the “live preview” experience. - On attribute options change — the inline option editor in the Attributes subsection updates
choice_optionswithout immediately re-running the matrix (to avoid an expensive deep re-render). The matrix is rebuilt on save or when the user clicks Build variants if it is exposed.
The shared helper that does the actual cartesian expansion is buildCatalogVariantBlueprints + buildUnitAxisSegments in packages/shared. Every variant row produced is also given:
- A stable key derived from the option combination (
normalizeCatalogVariantKeyForForm) so React renders are stable across reorders. - A PLU if the product uses a custom EAN-13 (per-unit scan flow) — see
pos-per-unit-barcode-scan.util.ts.
X.7 Variant bulk price rules (Power-user)
Section titled “X.7 Variant bulk price rules (Power-user)”For stores that need to apply the same percentage discount to every variant at once (e.g. seasonal sale), the Other settings section exposes a bulk-price tool (applyBulkPricesToCatalogVariations). It accepts a single patch and writes it to every variant in one save. See Section XIII for the entry point.
XI. Section: Stores & inventory
Section titled “XI. Section: Stores & inventory”Implemented by ProductFormStoresAndInventorySection. The accordion is split into two halves: store assignment at the top, per-warehouse stock matrix at the bottom.
 The Stores & inventory accordion. The top half lists the stores the product is assigned to; the bottom half is the per-warehouse stock matrix for the currently selected store tab.
XI.1 Store assignment
Section titled “XI.1 Store assignment”| Action | What it does |
|---|---|
| + Assign stores | Opens a drawer listing every store in your tenant. Multi-select the stores where this product should exist. |
| Edit (selection toolbar) | Re-opens the drawer so you can add/remove stores. |
| Remove (selection toolbar) | Drops the selected stores. Existing per-warehouse stock for the dropped store is preserved (not deleted) so re-adding the store later keeps the history. |
If the product was created via the Add item details modal, it is automatically assigned to the first active store in the tenant. You can override that here.
XI.2 Per-warehouse stock matrix
Section titled “XI.2 Per-warehouse stock matrix”The bottom half of the accordion is a per-store tab strip + a per-warehouse stock table:
- Store tabs — one tab per store assigned to the product. Click a tab to switch the warehouse matrix below.
- Warehouse rows — one row per warehouse linked to the selected store. Each row has:
- Warehouse name (read-only)
- Stock qty (editable) — on-hand units at that warehouse
- Low stock threshold (editable) — alert threshold for low-stock notifications
- Total — the sum of every warehouse’s stock for the current store, shown in the table footer
RBAC: the
Totalline respects cost-view permission just like the Cost field in the Details section. A user without cost-view sees the same numbers but in a more compact summary.
XI.3 Product-level vs variant-level stock
Section titled “XI.3 Product-level vs variant-level stock”There are two stock modes, and the form picks one based on whether the product has variants:
- Product-level (no variants) — every warehouse row maps directly to the product. The accordion shows one editable stock qty cell per warehouse.
- Variant-level (with variants) — every warehouse row is split per variant. The accordion shows a matrix with one column per variant and one row per warehouse; each cell is the on-hand count for that variant at that warehouse. The header of the matrix lists every variant name; the row footer sums per warehouse.
If you are switching an existing product from “no variants” to “with variants”, the existing per-warehouse stock is migrated to the default variant (the first one in the matrix) — review and redistribute manually if needed.
XII. Section: Promotions & discounts
Section titled “XII. Section: Promotions & discounts”Implemented by ProductFormPromotionsSection. The accordion exposes three independent promotion kinds — all optional, all additive.
| Promotion kind | What it does | Empty state |
|---|---|---|
| Line discount | A fixed % or amount off the unit price at checkout (e.g. 10% off always, or 5 000₫ off on Fridays). | “No line discount configured” |
| Maximum cart quantity | A hard cap on how many units a single cart may contain. Useful for “limit 2 per customer” rules. | “No purchase limit” |
| Quantity & bundle promotions | Buy 2 get 1 free; 3 for the price of 2; buy 2 of X, get 50% off Y; etc. Multiple promotions can stack. | “No quantity promotions configured” |
Click Edit promotions to open the Promotions drawer. The drawer is a guided form — one tab per promotion kind — and the active count is shown in a green badge in the accordion header.
Promotions configured here are per product. Store-wide promotions (e.g. “10% off everything in August”) are managed under the Marketing area — see
/dashboard/discounts.
XIII. Section: Other settings — conversion units & suppliers
Section titled “XIII. Section: Other settings — conversion units & suppliers”Implemented by ProductFormOtherSubsectionHeading + the conversion units and suppliers sub-components. This is the section that holds concepts that don’t fit the Clover reference layout.
 The Other settings accordion. Top: conversion units (pack → each). Bottom: suppliers.
XIII.1 Conversion units (pack → each)
Section titled “XIII.1 Conversion units (pack → each)”Many products are sold in multiple units at the same time. A bag of rice might be sold per bag to retail customers and per kg to wholesale customers. The conversion unit table lets you declare those relationships.
| Column | Meaning |
|---|---|
| Unit | The secondary unit (e.g. “Bag”). |
| Units per pack | How many base units fit in one pack (e.g. 1 bag = 50 kg). |
| POS default | Whether this unit is the default in the Wholesale workspace (and the secondary default in Retail). |
| Import default | Whether this unit is the default for receiving stock from a purchase lot. |
| Unpack | Whether the cashier is allowed to break a pack open at the counter (sell 1 kg from a 50 kg bag). |
To add a conversion row, click + Add unit next to the section heading and pick a unit from the list. The form pre-fills units per pack = 1; adjust as needed. Conversion rows are stored as additional variations on the product with a special kind = conversion flag — they participate in stock counts but do not show up in the regular Item variants accordion.
Anti-pattern: do not use conversion units to represent true variants (Size / Color). The two systems are independent — conversion units are about quantity, variants are about identity.
XIII.2 Suppliers & supplier catalog numbers
Section titled “XIII.2 Suppliers & supplier catalog numbers”The bottom half of the Other settings accordion. Each row links a supplier to this product and records the supplier catalog number — the SKU the supplier uses internally. This is essential for:
- Re-ordering (the purchase order uses the supplier catalog number).
- Cross-referencing receipts from the supplier back to your catalog.
- Tracking cost-per-supplier when the same product has multiple suppliers.
Click + Add supplier to pick from the supplier list. The drawer shows each supplier’s name and (if set) their contact info.
Suppliers are managed under
VENDOR_ROUTES.items.suppliers(/dashboard/items/suppliers). To enable the Smart import workflow (auto-create products from a supplier’s catalog file), ask the supplier to upload their catalog at/dashboard/items/suppliers/smart-import.
XIV. Retail vs Wholesale at a glance
Section titled “XIV. Retail vs Wholesale at a glance”The product form exposes a single type (Catalog type) picker that controls which channels the product is sold on:
| Catalog type | Where it shows | Price used |
|---|---|---|
| RETAIL (default) | POS workspace (/point-of-sale/sale), online menu | price (retail) |
| WHOLESALE | Wholesale POS workspace (/dashboard/orders/create-wholesale), B2B portal | wholesale_price |
The form lets you enable both types on the same product — in that case the same product row appears in both the retail and wholesale workspaces, and the right price is picked automatically based on the channel.
Default for new products is
[RETAIL]only (seeVENDOR_PRODUCT_DEFAULT_TYPESinpackages/shared). If you sell wholesale, remember to also enable the WHOLESALE catalog type on every product you want to expose to that channel — the system does not auto-mirror.
XV. Excel import (many products)
Section titled “XV. Excel import (many products)”If you already have a product list (CSV/Excel), use the import template:
- Items → Item list → Import menu (top-right) → download the Excel template.
- Fill in the columns:
name | sku | barcode | category | unit | price | stock | status. - Upload → preview the rows → confirm.
Limit: the API accepts up to 200 rows per upload. Split large files into 200-row chunks. The vendor web enforces the same cap on the batch operations toolbar (see Dashboard table pagination rule).
The endpoint is POST /api/v1/vendor/products/import-excel — see API catalog → “Vendor products”.
XVI. Sub-areas under Items
Section titled “XVI. Sub-areas under Items”The Items group in the sidebar has more than just the list. Each sub-area is a Settings-style page that the product form links into.
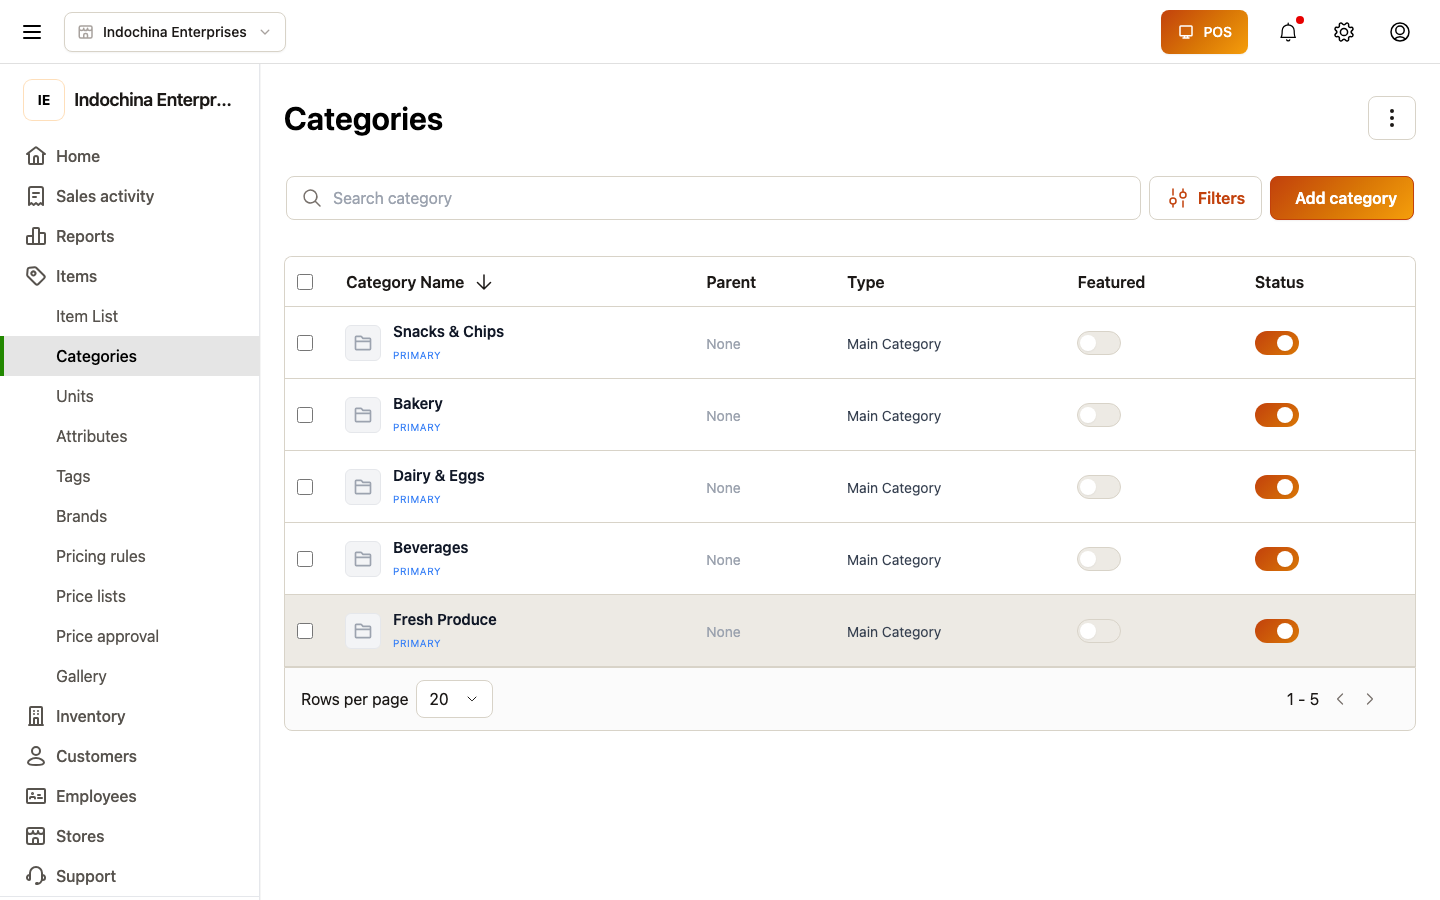 Categories — the master list of categories you can assign to products.
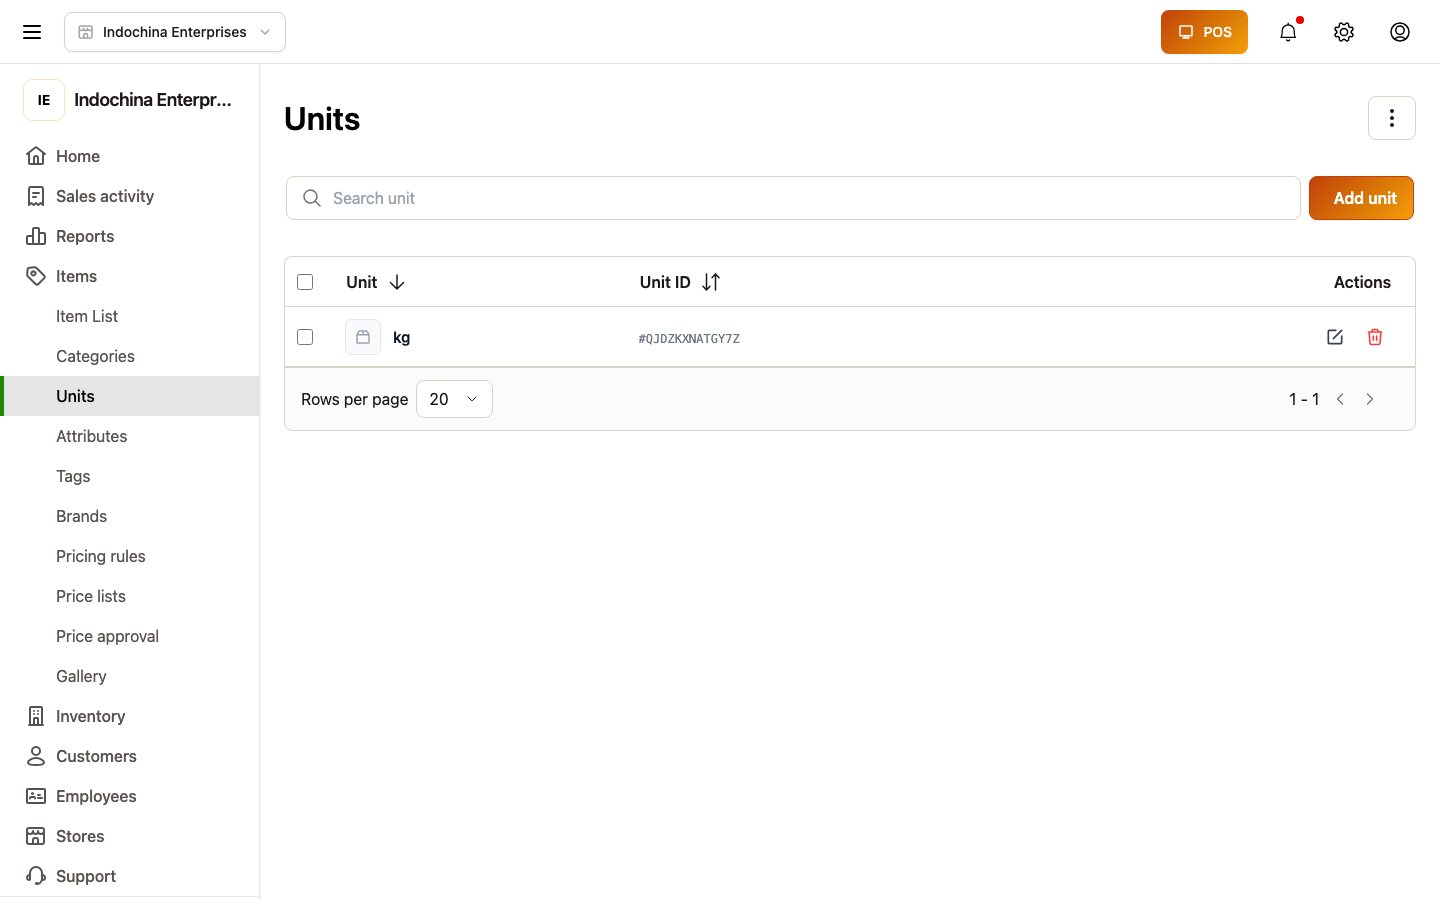 Units of measure (each, kg, pack…).
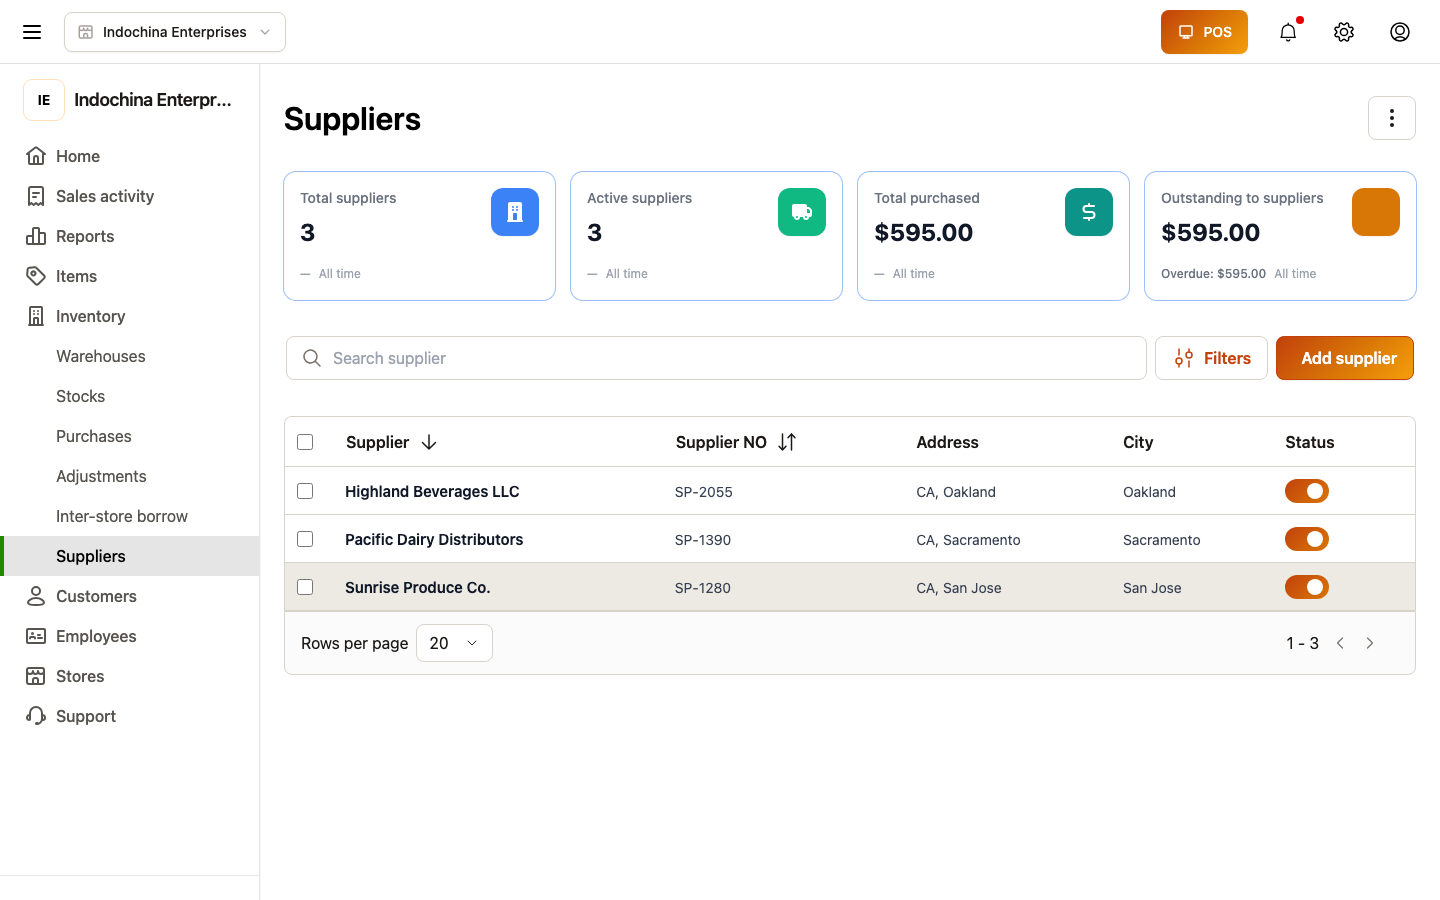 Suppliers — used when stock-in arrives in Step 2.
| Sub-area | Route | What it does |
|---|---|---|
| Categories | /dashboard/items/categories | Master list of categories (drag-reorder, primary flag). |
| Modifier groups | /dashboard/items/modifier-groups | Add-on / option groups (e.g. “Toppings” with Pepperoni / Mushroom). |
| Units | /dashboard/items/units | Master list of units. The product form’s Unit picker reads from here. |
| Taxes and fees | /dashboard/items/taxes | Reusable store tax profiles. The product form’s Taxes and fees accordion reads from here. |
| Attributes | /dashboard/items/attributes | Master list of attributes (Size, Color, …) used to generate variants. |
| Tags | /dashboard/items/tags | Free-form tags for filtering and reporting. |
| Brands | /dashboard/items/brands | Brand list. Used in the Products filter drawer. |
| Pricing rules | /dashboard/items/pricing-rules | Rule-based bulk price changes (e.g. 10% off everything in a category). |
| Price lists | /dashboard/items/price-lists | Multi-tier price lists per channel. |
| Price approvals | /dashboard/items/price-approvals | Review queue for price changes that exceed approval thresholds. |
| Addons | /dashboard/items/addons | POS add-on catalog. |
| Gallery | /dashboard/items/gallery | Vendor media gallery — pick images for product covers and albums. |
| Suppliers | /dashboard/items/suppliers | Supplier master data (name, contact, payment terms, catalog files). |
| Suppliers smart import | /dashboard/items/suppliers/smart-import | Bulk-create products from a supplier’s catalog file. |
XVII. Checklist before moving on
Section titled “XVII. Checklist before moving on”- At least one product shows in the POS catalog.
- Sale price matches what you entered.
- Barcode (if any) scans correctly at the counter.
- Stock is greater than 0 (or Track stock is off).
- Product is in Active status (not Draft).
- You opened the full edit page and recognised every accordion section.
- (If you sell wholesale) the Wholesale catalog type is enabled and the Wholesale price is set.
- (If you sell variants) at least one attribute is bound and the variant matrix is generated and reviewed.
- (If you sell in multiple stores) the product is assigned to every relevant store, and per-warehouse stock is set.
XVIII. Next step
Section titled “XVIII. Next step”→ Step 2 — Stock in (Lots) to put real stock on the shelf: step 2.
XIX. Related articles
Section titled “XIX. Related articles”- Catalog & products — full reference for Items, Categories, Units, Attributes, Tags, Suppliers.
- POS Workspace tour — how products show at the counter.
- Wholesale pricing — deeper guide on retail vs wholesale price lists.
- API catalog — Vendor products